Open Ticket
 +373 79 600002
 Telegram Live Chat
 F.A.Q
 English
 Русский
 Română
 Deutsch
 Français
 Türkçe
 Español
 Português
 Українська
 български
 Polski
 Indonesia
 中文 (中国)


 on All Hosting Services


How to Get Started with AlexHost VPN: A Step-by-Step Guide
To start using AlexHost VPN, order a plan, complete payment, and use the login details sent to your email to connect through the VPNClient app. You’ll need an email address, a payment method, and the device you want to connect.
The setup follows this path: order → sign up or log in → pay → receive your VPN details → change your VPN password → install the app → connect.
1. Order your VPN plan
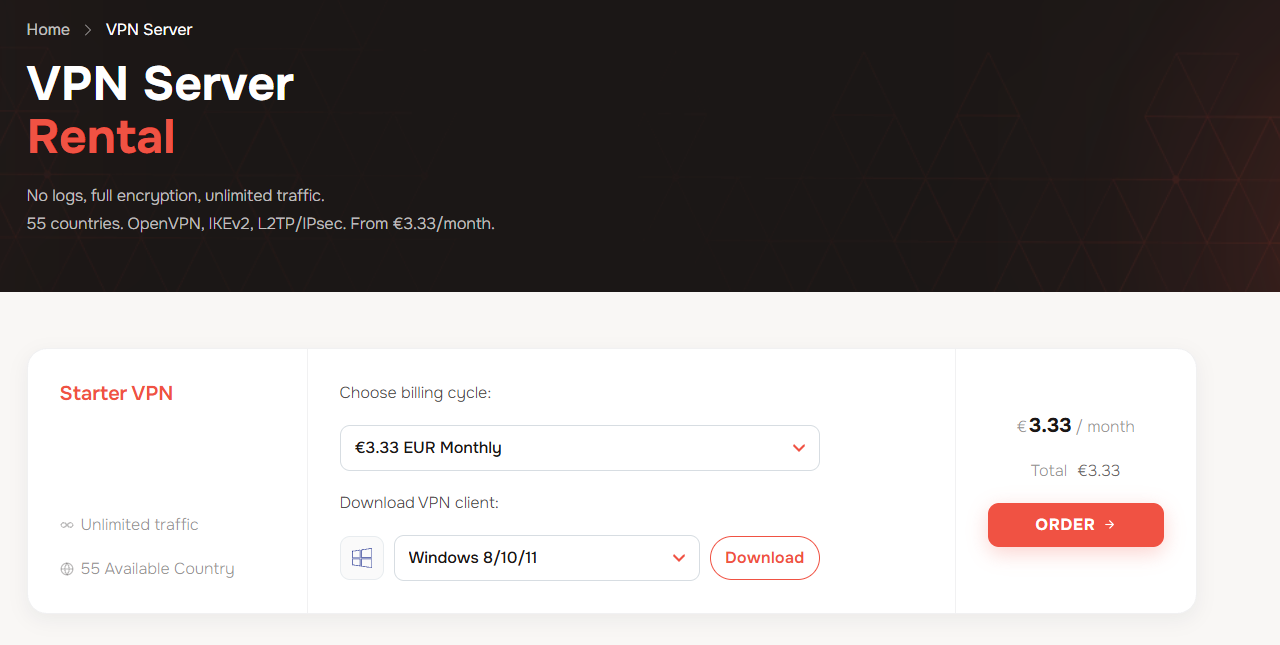
- Open the AlexHost VPN page.
- Under Choose billing cycle, select your preferred billing period.
- Under Download VPN client, choose your device or operating system from the dropdown, such as Windows 8/10/11. You can click Download to get the app now, or download it later using the links in your welcome email.
- Click Order.
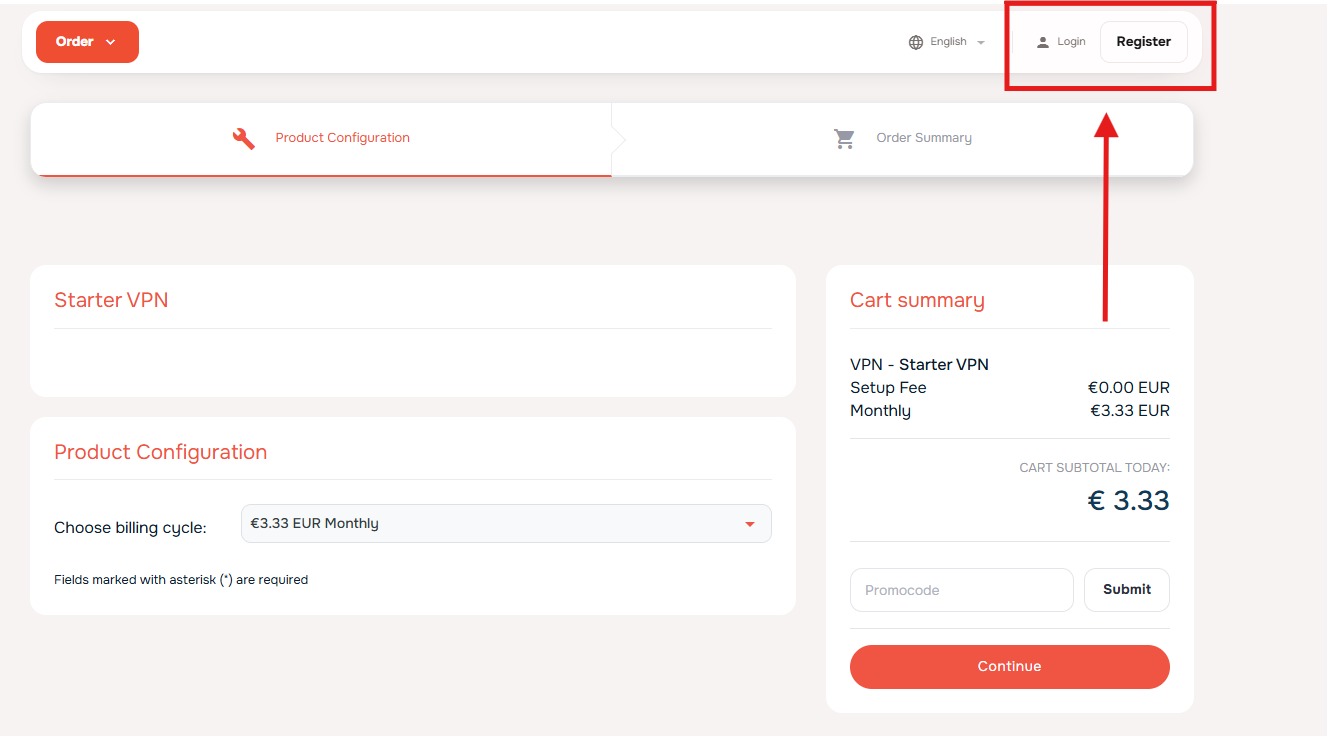
- On the Product Configuration page, check Choose billing cycle and adjust the billing period if needed.
- Review Cart summary on the right, including the setup fee, billing period, and total due.
- Enter BFVPN in the Promocode field and click Submit. Check that the discount appears in the total before continuing. If you don’t have a code, leave the field empty.
- If you’re not signed in, create an account or sign in as described in Step 2. Once signed in, click Continue to proceed to the Order Summary.
You can download the app now, but you’ll need your VPN login details to use it. After payment is confirmed, AlexHost sends an important welcome email containing your VPN username, initial password, and app download links. Keep this email handy for the setup steps below.
2. Create an account or sign in
On the Product Configuration page, the Login and Register buttons are in the top-right corner:
- Already have an AlexHost account? Click Login and sign in.
- New to AlexHost? Click Register to create an account.
When registering, use the Google sign-up option under or continue with, or complete the registration form with your contact details, a client-area password, and the required billing information.
Use an email address you can access. AlexHost sends your VPN username, initial VPN password, and app download links to this address after payment. You’ll need that message to continue the setup.
Important: Your AlexHost client-area account and your VPN use separate login details. The password you create during registration is for the client area. Your VPN credentials arrive separately by email.
After registration or sign-in, you may land on the Welcome page, with Place New Order, Client Area, and Support cards. This means you are signed in to your AlexHost account; you still need to complete your VPN order and payment.
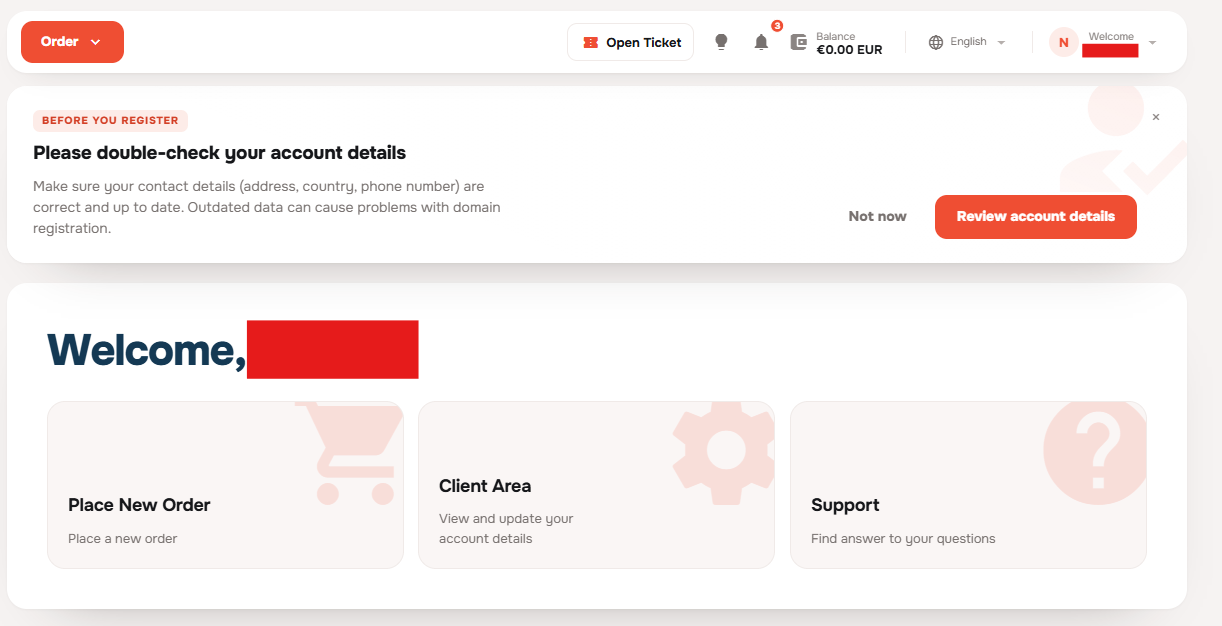
If you land here instead of returning to checkout, go back to the AlexHost VPN page and continue the order process from Step 1 while signed in.
3. Review checkout and pay
Check the order summary and account details
- In Order Summary, confirm that VPN – Starter VPN is listed. Check Total Recurring for the renewal amount and billing period, and Total Due Today for the amount payable now. Use Edit Configuration if you need to change the plan configuration.
- If you have not already applied a promo code, you can use Use promotional code here. Check that any discount is reflected before proceeding.
- Review Client Information, particularly your email address and billing details. Your VPN credentials and app download links will be sent to the email address on your account.
- Read the Terms of Use, Privacy Policy, and Acceptable Usage Policy, then tick the corresponding acceptance boxes to proceed.
Choose a payment method
Under Choose payment method, select a category and then a payment option:
- Cards: Visa/Mastercard options show a 4% fee; KASSA (RU CARD) for Russian-issued cards shows 14%.
- PayPal: Pay with your PayPal account; the options shown carry a 7% fee.
- Crypto: Choose USDT TRC20/Monero or the broader cryptocurrency option; both show a 7% fee.
- Account: Choose BankTransfer (shown as 1–3 days) or Credit Balance to pay from your account balance. Both show no processing fee.
Check the current fee notice, any applicable VAT, and the final total before paying.
Under Invoice will be issued to, check the billing contact. Use Change if you need to select a different contact, then click Checkout.
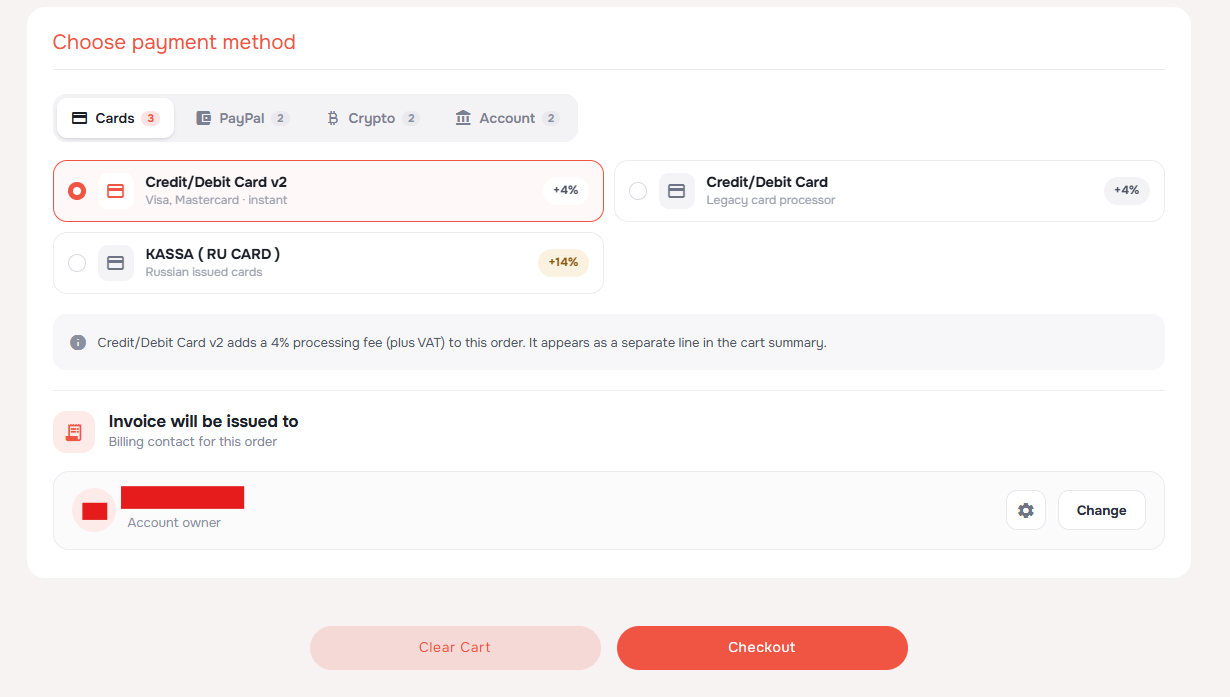
Complete payment
Follow the payment instructions after checkout. If you are taken to a Pro Forma Invoice marked UNPAID, click Pay Now! and complete payment using the available methods. If you still need to apply an invoice coupon, use Add Coupon Code and check the discount before paying.
VPN activation follows payment confirmation. Bank transfers can take longer to confirm than other payment methods.
Find your VPN on the dashboard
After checkout and payment, open your client-area Dashboard. Under My services, select the VPN tab and open the Starter VPN card for your order.
The service may still show PENDING while activation is being processed, even after you have completed payment. Check that the invoice is marked as paid, then refresh the dashboard later to check the service status.
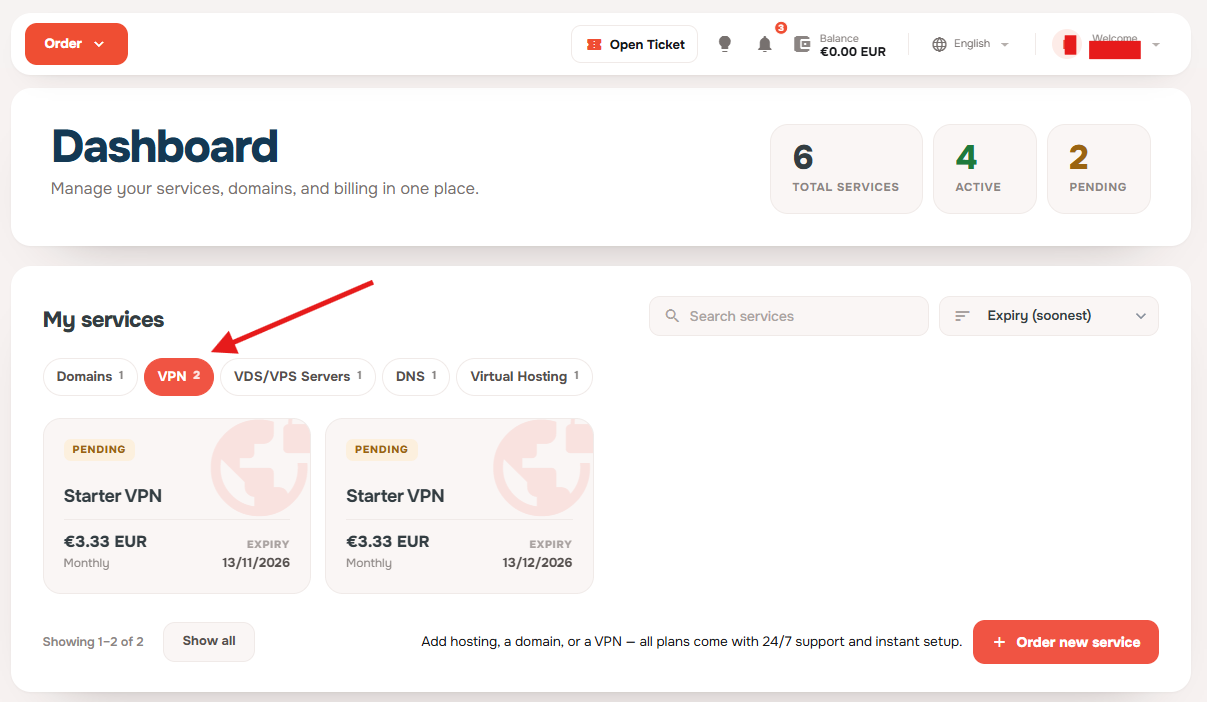
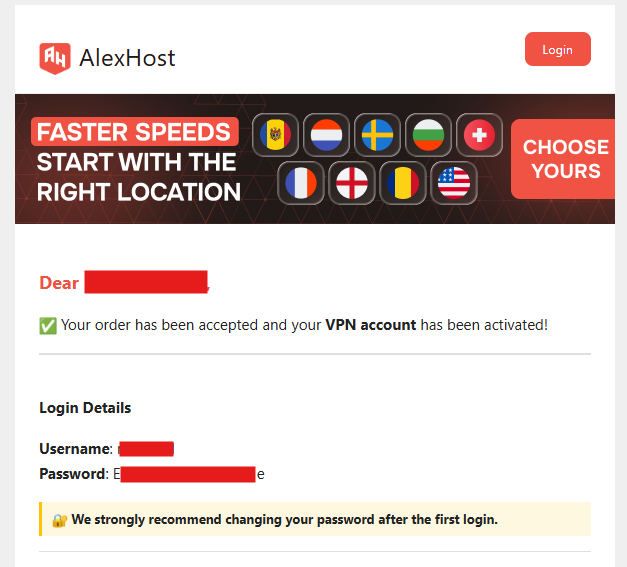
Watch your inbox for the “VPN account created” email. It contains your VPN username, initial password, and app download links—the information you need to continue setup.
4. Find your VPN login and change your password
Click the Starter VPN card under Dashboard → My services → VPN to open the service page.
The page opens on Service Details, which shows billing and renewal information. Use VPN details in the left menu for connection information, or Reset Password to change your VPN password.
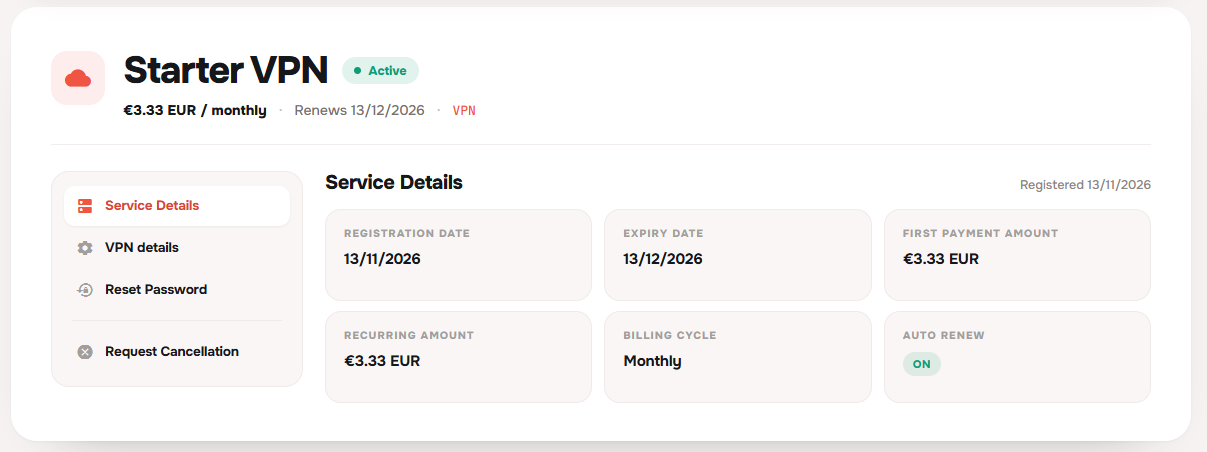
Check the email address you used for your AlexHost account. Your VPN activation email contains your VPN username and initial password—you need these separate credentials to use the VPN. Look for the “VPN account created” email. If you cannot find it, check Spam and Promotions and confirm that your invoice is marked as paid.
Keep this email handy during setup. It contains:
- Your VPN username. Use this to sign in to VPNClient; it is different from your client-area email address.
- Your initial VPN password. Change it before signing in to the app.
- VPNClient download links. Use the link for the device you want to connect.
You can also find your VPN username in the client area:
- Sign in at bill.alexhost.com.
- Open Services → Starter VPN.
- Select VPN details in the left menu. The default Service Details view shows billing information; open VPN details to see the connection information.
- Find your VPN username under Local ID (IKEv2).
Next, change the initial VPN password, which was delivered through your mailbox:
- From the same service page, select Reset Password in the left menu.
- The page asks “Do you really want to reset your password?” Click the red Reset Password button to confirm.
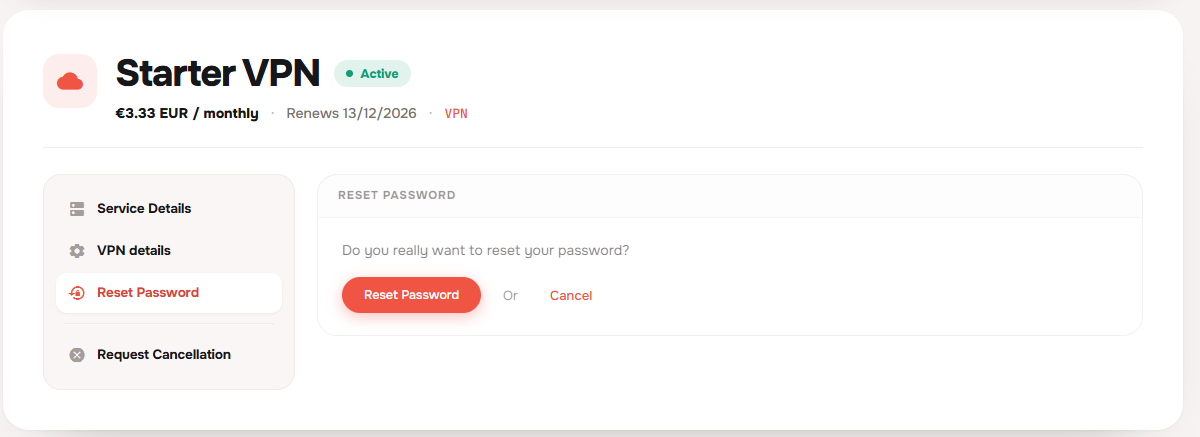
Follow the instructions shown after confirmation to complete the reset, then save your new VPN password in your password manager.
Use your VPN username and this new password when you sign in to VPNClient. The initial password in the email will no longer be the one to use.
The VPN password is managed in the client area, rather than in the app.
5. Install VPNClient on your device
The AlexHost VPN app is called VPNClient. Return to your “VPN account created” email and find Download the App. Click Download beside your platform: Mac, iOS, Linux, Windows, Android Mobile, or Android TV / FireTV (Firestick).
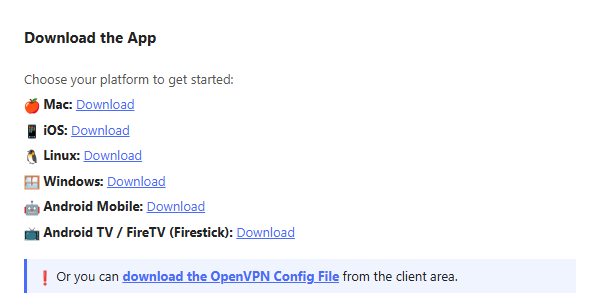
Install the downloaded app using the instructions for your device:
| Device | What to do |
|---|---|
| Windows | Download and run the installer, then follow the installation prompts. |
| macOS | Download the app and follow the installation instructions. If provided as an app to drag into Applications, move it there before opening it. |
| iPhone or iPad | Open the iOS download link from the email on your device and follow the installation prompts. |
| Android | Open the Android download link from the email and install the app. |
| Android TV / Fire TV | Use the Android TV download link from the email and follow the installation instructions for your device. |
| Linux | Open the Linux download link from the email and follow the instructions for the supplied package. |
6. Sign in, choose a server, and connect
Open VPNClient. On the Login to your account screen, enter your VPN username and the new VPN password from Step 4, then click Log in. Use your VPN credentials, not your AlexHost client-area email and password.
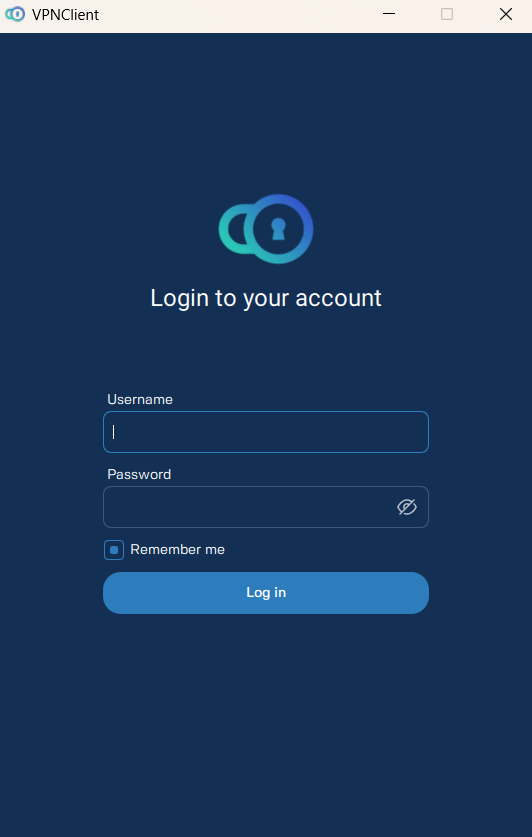
After signing in:
- Click or tap the server row to choose a location, such as BE, Brussels #1.
- Press the large round power button to connect.
- If your device asks for permission to add a VPN configuration or establish a VPN connection, approve the request.
On iPhone or iPad, you may also need to confirm with Face ID, Touch ID, or your device passcode. On Android TV or Fire TV, use the remote to enter your credentials and select a server.
Wait for the connection timer to start, then check the connection as described below.
7. Check that your VPN is working
When connected, VPNClient shows a running Connecting time timer, your selected server, and Switch OFF beneath the power button. The Download and Upload counters show transferred data as you use the connection.
Check Your current IP beneath the counters: it should show the VPN server’s IP and country flag. In this example, the selected server is BE, Brussels #1, with a Belgian flag.
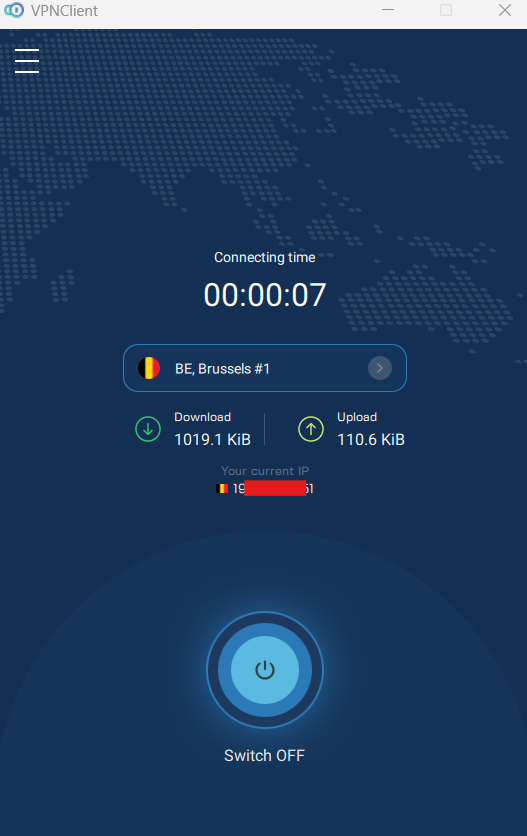
For an independent check, compare your public IP on an IP-checking website before and after connecting. After connection, refresh the page: it should show a different public IP belonging to the VPN server. IP-location databases may not always agree on the exact country or city.
Once the app shows an active connection and your browser’s public IP has changed, you’re ready to use the VPN.
Troubleshooting
| Problem | What to try |
|---|---|
| After signing in, I see the Welcome page instead of my VPN checkout | Return to the AlexHost VPN page and continue the order process while signed in. Creating an AlexHost account does not activate the VPN; you still need to complete the order and payment. |
| The checkout total is higher than the plan price | Check the selected payment method for a processing fee and any applicable VAT. Review the fee notice and updated cart summary before paying. |
| The VPN still shows PENDING after payment | Confirm that the invoice is marked as paid, then refresh Dashboard → My services → VPN later. If the service remains pending and no activation email arrives, use Open Ticket in the client area to ask support to check the order. |
| The “VPN account created” email has not arrived | Check Spam and Promotions. Confirm that the invoice is marked as paid and that you are checking the email address used for your AlexHost account. You can also look for your VPN username under Services → Starter VPN → VPN details. |
| A bank-transfer payment is still pending | Check the invoice status and allow time for payment confirmation. Contact support if you need help checking the transfer before making another payment. |
| The app says the username or password is incorrect | Use your VPN username, not your client-area email address. If you changed the VPN password, use the new one. If necessary, set another password through Reset Password in the client area. |
| The app connects, but websites do not load | Disconnect and try another server. If you are using an OpenVPN client, try another available TCP or UDP configuration. |
| The VPN will not connect on your network | Try another server or another network, such as mobile data, to check whether the issue is specific to the current network. |
| You still need help | Open a support ticket from your AlexHost client area or use the AlexHost contact page. Include your device, operating system, and the exact error message. Do not send your VPN password. |
Optional: connect without VPNClient
If you need to configure a router or a device that cannot run VPNClient, open Services → Starter VPN → VPN details in the client area. This section contains server information and manual connection options.
| Method | When to use it | Where to start |
|---|---|---|
| OpenVPN | A compatible router, Linux setup, or another OpenVPN client | Select a server and an available protocol/port combination, then download its configuration file. Use your VPN username and current VPN password when prompted. |
| IKEv2 | A device with built-in IKEv2 support | Open the server’s connection details and follow the setup instructions for your operating system. The available fields differ between Windows, macOS, and iOS. |
| L2TP/IPsec | A legacy device that requires this connection method | Open the server details for the server address and pre-shared key. You will also need your VPN username and current VPN password. Prefer another supported method when available. |
Use Show details beside a server to view its full connection information.