English
 Русский
  Română
  Deutsch
  Français
  Türkçe
  Español
  Português
  Українська
  български
  Polski
  Indonesia
  中文 (中国)


 on All Hosting Services
Linux `mount` Command: The Complete Guide for VPS and System Administrators
Managing storage devices efficiently is one of the most critical skills for any Linux system administrator. Whether you're running a high-traffic web application, maintaining backups, or integrating network-attached storage, the mount command sits at the heart of every storage operation. For administrators managing a VPS Hosting environment — particularly those running Ubuntu or Debian-based distributions — a deep understanding of mount translates directly into better uptime, faster troubleshooting, and more reliable data access.
This comprehensive guide covers everything you need to know about the Linux mount command: its syntax, options, real-world usage examples, persistent configuration via /etc/fstab, and practical troubleshooting techniques.
What Is the mount Command in Linux?
In Linux, every storage device — whether a physical hard drive, a USB stick, an NFS network share, or a virtual disk — must be attached to the filesystem hierarchy before its contents can be accessed. This process is called mounting, and the mount command is the primary tool for performing it.
When you mount a device, you associate it with a mount point: a directory in the existing filesystem tree (e.g., /mnt/data). Once mounted, all files on that device become accessible through that directory, as if they were native parts of the system.
This model is fundamentally different from Windows drive letters (C:, D:, etc.) and is one of the reasons Linux offers such granular, flexible control over storage.
Basic Syntax
mount [options] <device> <mount_point>| Parameter | Description |
|---|---|
<device> | The block device to mount (e.g., /dev/sda1, /dev/sdb1) |
<mount_point> | The target directory where the device will be accessible |
Example:
sudo mount /dev/sda1 /mnt/mydriveThis attaches the partition /dev/sda1 to the directory /mnt/mydrive.
Commonly Used Options
The mount command supports a rich set of options that control how a filesystem is attached and accessed:
| Option | Description |
|---|---|
-t <type> | Specify the filesystem type (e.g., ext4, ntfs, vfat, nfs, xfs) |
-o <options> | Pass mount options (e.g., ro, rw, noexec, nosuid, user) |
-a | Mount all filesystems listed in /etc/fstab |
-r | Mount the filesystem as read-only (equivalent to -o ro) |
-v | Verbose mode — outputs detailed information about the mount process |
--bind | Bind-mount a directory to another location in the filesystem |
-l | List all mounted filesystems with their labels |
Common -o Mount Options
| Option | Meaning |
|---|---|
ro | Mount as read-only |
rw | Mount as read-write (default) |
noexec | Prevent execution of binaries on this filesystem |
nosuid | Ignore setuid and setgid bits |
user | Allow non-root users to mount this filesystem |
defaults | Use default options: rw, suid, dev, exec, auto, nouser, async |
noatime | Do not update access times (improves performance) |
Step-by-Step: Mounting a Filesystem
Step 1: Identify the Device
Before mounting, you need to know the device name. Use lsblk to list all block devices:
lsblkExample output:
NAME   MAJ:MIN RM  SIZE RO TYPE MOUNTPOINT
sda      8:0    0   50G  0 disk
├─sda1   8:1    0   49G  0 part /
└─sda2   8:2    0    1G  0 part [SWAP]
sdb      8:16   0   20G  0 disk
└─sdb1   8:17   0   20G  0 part
In this example, /dev/sdb1 is an unmounted 20 GB partition ready to be mounted.
Alternatively, use fdisk -l for more detailed partition information:
sudo fdisk -l
Step 2: Create the Mount Point Directory
The mount point must exist before you can mount anything to it. Create it with mkdir:
sudo mkdir -p /mnt/mydriveThe -p flag ensures the full path is created, even if intermediate directories don't exist yet.
Step 3: Mount the Filesystem
Now mount the device to the directory:
sudo mount -t ext4 /dev/sda1 /mnt/mydriveIf you omit -t, Linux will attempt to auto-detect the filesystem type — this works reliably for most common formats.
Step 4: Verify the Mount
Confirm the filesystem was mounted successfully:
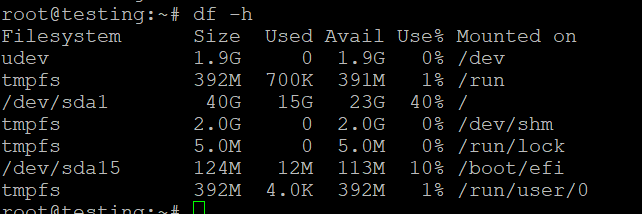
mount | grep mydriveOr use df for a human-readable overview of all mounted filesystems and their disk usage:
df -hYou can also list the contents of the mount point directly:
ls /mnt/mydriveStep 5: Troubleshooting Failed Mounts
If the mount fails, check the kernel ring buffer for detailed error messages:
dmesg | tail -20This is especially useful for diagnosing hardware errors, corrupted filesystems, or missing kernel modules.
Practical Mounting Examples
Example 1: Mounting a Local ext4 Partition
sudo mount -t ext4 /dev/sda1 /mnt/mydriveThis is the most common scenario — mounting a local Linux partition formatted with the ext4 filesystem.
Example 2: Mounting a USB Drive (FAT32)
USB drives are often formatted with FAT32 (vfat) for cross-platform compatibility.
First, identify the device:
lsblkThen mount it:
sudo mkdir -p /mnt/usb
sudo mount -t vfat /dev/sdb1 /mnt/usb
To mount with UTF-8 character support (recommended for filenames with special characters):
sudo mount -t vfat -o utf8 /dev/sdb1 /mnt/usbExample 3: Mounting an NTFS Drive (Windows Partition)
sudo mount -t ntfs-3g /dev/sdc1 /mnt/windows> Note: You may need to install ntfs-3g first: sudo apt install ntfs-3g
Example 4: Mounting an NFS Network Share
NFS (Network File System) allows you to mount remote directories over a network — a common requirement for VPS environments and clustered infrastructure.
sudo mount -t nfs 192.168.1.100:/exports/data /mnt/nfsReplace 192.168.1.100 with your NFS server's IP address and /exports/data with the exported path.
> Prerequisite: Install NFS client tools: sudo apt install nfs-common
Example 5: Mounting a Filesystem as Read-Only
Useful for safely inspecting a potentially corrupted disk without risking further damage:
sudo mount -o ro /dev/sda1 /mnt/readonlyExample 6: Bind Mounting a Directory
Bind mounts allow you to make a directory accessible from a second location — useful in chroot environments, containers, or complex web server setups:
sudo mount --bind /var/www/html /mnt/webroot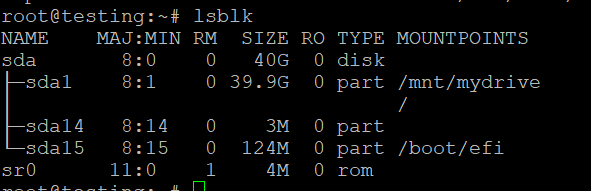
Viewing All Currently Mounted Filesystems
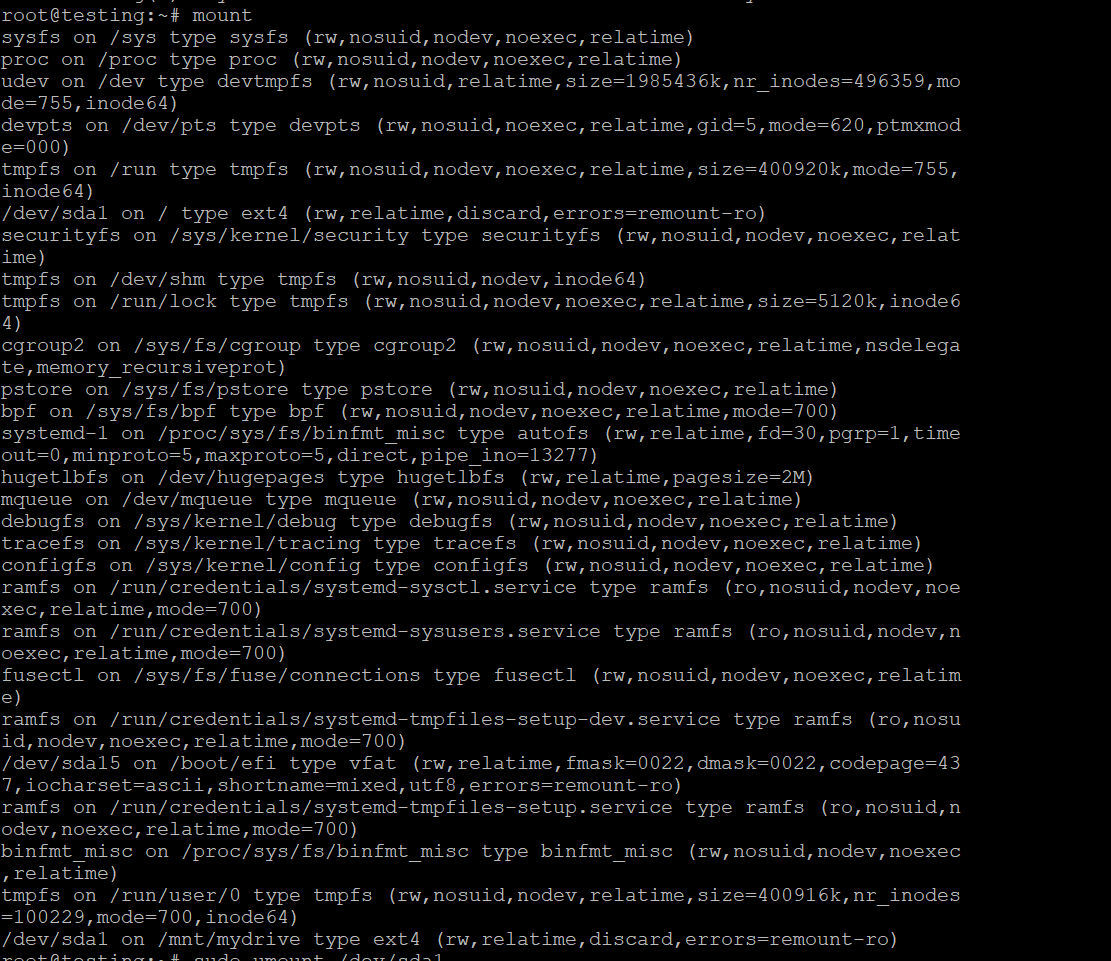
To display all active mounts:
mountFor a more readable, tabular output with disk usage:
df -hTo view only specific filesystem types (e.g., all ext4 mounts):
mount -t ext4Unmounting a Filesystem
When you're done with a mounted device, unmount it using umount (note: no 'n' in umount):
sudo umount /mnt/mydriveOr by device name:
sudo umount /dev/sda1Handling "Device Is Busy" Errors
If a process is actively using the filesystem, umount will fail with a "target is busy" error. Identify the offending processes with lsof:
lsof +D /mnt/mydriveOr use fuser:
fuser -m /mnt/mydriveOnce you've identified and stopped the processes, retry the unmount. For stubborn cases, you can use a lazy unmount (detaches the filesystem once it's no longer in use):
sudo umount -l /mnt/mydriveAutomating Mounts with /etc/fstab
Manually mounting filesystems after every reboot is impractical in production environments. The /etc/fstab file defines filesystems that should be mounted automatically at boot time — an essential configuration for any serious VPS Hosting or Dedicated Servers deployment.
/etc/fstab Entry Format
Each line in /etc/fstab follows this format:
<device> <mount_point> <type> <options> <dump> <pass>| Field | Description |
|---|---|
<device> | Device path or UUID (e.g., /dev/sda1 or UUID=xxxx) |
<mount_point> | Directory where the device will be mounted |
<type> | Filesystem type (e.g., ext4, vfat, nfs) |
<options> | Mount options (e.g., defaults, ro, noatime) |
<dump> | Backup flag — 0 disables, 1 enables dump backup |
<pass> | fsck order — 0 skips, 1 for root, 2 for others |
Step-by-Step: Adding a Persistent Mount
Step 1: Find the Device UUID
Using UUIDs instead of device names (like /dev/sda1) is strongly recommended because device names can change after reboots or hardware changes:
sudo blkidExample output:
/dev/sda1: UUID="a1b2c3d4-e5f6-7890-abcd-ef1234567890" TYPE="ext4"Step 2: Create the Mount Point
sudo mkdir -p /mnt/mydriveStep 3: Edit /etc/fstab
Open the file with a text editor:
sudo nano /etc/fstabStep 4: Add the Entry
UUID=a1b2c3d4-e5f6-7890-abcd-ef1234567890 /mnt/mydrive ext4 defaults,noatime 0 2For an NFS share:
192.168.1.100:/exports/data /mnt/nfs nfs defaults,_netdev 0 0> Important: The _netdev option tells the system to wait for network availability before mounting — critical for NFS and other network-based filesystems.
Step 5: Save and Exit
In nano: press Ctrl + O to save, Enter to confirm, then Ctrl + X to exit.
Step 6: Test the Configuration
Before rebooting, test your /etc/fstab entries by mounting everything defined in the file:
sudo mount -aIf no errors appear, your configuration is correct. A misconfigured /etc/fstab can prevent your system from booting, so always test before rebooting.
Step 7: Verify
df -h
ls /mnt/mydrive
Troubleshooting Common Mount Errors
| Error | Likely Cause | Solution |
|---|---|---|
Permission denied | Insufficient privileges | Run with sudo |
No such file or directory | Mount point or device doesn't exist | Verify paths with lsblk and ls |
wrong fs type, bad option, bad superblock | Incorrect filesystem type or corrupted disk | Verify type with blkid; run fsck on the device |
Filesystem type not recognized | Missing kernel module or tools | Install required packages (e.g., ntfs-3g, nfs-common) |
Device is busy | Active processes using the mount | Use lsof +D <mount_point> to identify and stop them |
Mount point does not exist | Directory not created | Run sudo mkdir -p <mount_point> |
Running fsck on a Corrupted Filesystem
If you suspect filesystem corruption, unmount the device first, then run:
sudo fsck /dev/sdb1Never run fsck on a mounted filesystem — it can cause data loss.
Performance Tips for VPS and Server Environments
For administrators managing VPS Hosting or Dedicated Servers environments, these mount options can meaningfully improve I/O performance:
noatime— Disables access time updates on file reads, reducing unnecessary disk writes. Highly recommended for busy web servers and databases.nodiratime— Similar tonoatime, but specifically for directory access times.relatime— A balanced alternative tonoatimethat only updates access times when the modification time is newer.data=writeback(ext4) — Improves write performance by relaxing data journaling guarantees. Use only when data integrity is managed at the application level.
Example high-performance /etc/fstab entry for a data partition:
UUID=xxxx /var/www ext4 defaults,noatime,nodiratime 0 2Securing Mounted Filesystems
Security-conscious administrators — especially those running Shared Web Hosting platforms or multi-tenant environments — should consider these protective mount options:
noexec— Prevents execution of binaries from the mounted filesystem. Ideal for/tmpand user upload directories.nosuid— Ignores setuid/setgid bits, preventing privilege escalation attacks.nodev— Prevents interpretation of character or block special devices.
A hardened /tmp mount entry:
tmpfs /tmp tmpfs defaults,noatime,nosuid,nodev,noexec,size=2G 0 0Related Commands Quick Reference
| Command | Purpose |
|---|---|
lsblk | List all block devices and their mount points |
blkid | Display UUIDs and filesystem types of block devices |
df -h | Show disk space usage for all mounted filesystems |
du -sh <dir> | Show disk usage of a specific directory |
fdisk -l | List partition tables |
fsck <device> | Check and repair a filesystem |
umount <mount_point> | Unmount a filesystem |
lsof +D <path> | List open files under a directory |
fuser -m <path> | Show processes using a mount point |
Choosing the Right Hosting Environment
Understanding mount is most valuable when you have full control over your server environment. Here's how different hosting types affect your storage management capabilities:
- VPS Hosting — Full root access means complete control over mount points,
/etc/fstab, and custom storage configurations. Ideal for developers and sysadmins who need flexibility. - Dedicated Servers — Maximum control over physical hardware, RAID configurations, and advanced storage setups. Best for high-performance or compliance-sensitive workloads.
- Shared Web Hosting — Storage is managed by the provider; direct
mountaccess is not available. Suitable for simple websites that don't require custom storage configurations. - VPS with cPanel — Combines the flexibility of a VPS with a user-friendly control panel, making storage and file management accessible even without deep command-line expertise.
Conclusion
The mount command is one of the most fundamental and powerful tools in the Linux administrator's toolkit. From attaching a simple USB drive to integrating complex NFS shares across a distributed infrastructure, mastering mount gives you precise, reliable control over how your system accesses and manages storage.
Key takeaways from this guide:
- Use
lsblkandblkidto identify devices and their UUIDs before mounting - Always create the mount point directory before attempting to mount
- Use UUIDs in
/etc/fstabinstead of device names for stability - Always test
/etc/fstabchanges withsudo mount -abefore rebooting - Apply performance options like
noatimeand security options likenoexecwhere appropriate - Use
dmesg,lsof, andfsckfor effective troubleshooting
Whether you're provisioning a new Dedicated Servers deployment, configuring persistent storage on a VPS Hosting plan, or hardening a production web server, these skills will serve you in virtually every Linux administration scenario you encounter.