Open Ticket
  +373 79 600002
  Telegram Live Chat
  F.A.Q
F.A.Q  English
 Русский
  Română
  Deutsch
  Français
  Türkçe
  Español
  Português
  Українська
  български
  Polski
  Indonesia
  中文 (中国)









































































































 on All Hosting Services






How to Deploy n8n on a Debian 12 VPS: The Complete Self-Hosted Automation Guide
Running n8n on your own VPS is the most effective way to build secure, scalable, and always-on automation workflows. Unlike cloud-based automation services, self-hosting n8n on a VPS Hosting plan gives you full data privacy, unlimited workflow executions, 24/7 uptime, and completely predictable monthly costs. With Debian 12 as your base operating system, you benefit from long-term stability, strong community support, and access to the latest software packages.
This guide walks you through every step: updating your server, installing Docker and Docker Compose, generating an encryption key, configuring n8n, launching the service, and accessing the editor in your browser.
Why Run n8n on a VPS Instead of the Cloud?
While n8n does offer a managed cloud service, self-hosting your own n8n instance on a VPS delivers critical advantages for developers, businesses, and automation professionals:
- Full Data Privacy – All your workflows, API keys, credentials, and customer data remain entirely under your control. No third-party provider can access or audit your information.
- Unlimited Executions – On a VPS, you set the limits — not a SaaS pricing tier. Run as many workflows, triggers, and executions as your projects demand.
- 24/7 Availability – A VPS keeps your automations running at all times, even when your personal computer is powered off.
- Enhanced Security – Harden your instance with firewalls, SSL Certificates, VPN access, and your own encryption keys. All credentials are encrypted at rest.
- Scalability and Performance – With AlexHost VPS resources, you can upgrade CPU, RAM, and storage on demand as your automation workloads grow.
- Cost-Effectiveness – Instead of paying per execution, you pay a fixed monthly VPS fee and run unlimited workflows for no additional charge.
> In short: Deploying n8n on your own VPS transforms your server into a powerful self-hosted automation hub where you control the data, performance, and costs entirely.
Prerequisites
Before you begin, make sure you have:
- A running VPS Hosting instance with Debian 12 (Bookworm) installed
- Root or sudo access via SSH
- A public IP address for your VPS
- Basic familiarity with the Linux command line
Step 1: Update the Server
Always start by bringing your Debian 12 system fully up to date. This ensures you have the latest security patches and package metadata before installing any new software.
sudo apt update && sudo apt upgrade -yWhat to expect: You will see packages being downloaded and upgraded. Once complete, the terminal confirms with a summary such as 0 upgraded, 0 newly installed if everything was already current.
Step 2: Install Docker and Docker Compose
n8n runs best inside a Docker container, which isolates the application and makes updates straightforward. Follow these steps to install Docker Engine and the Compose plugin from Docker's official repository.
Install Required Dependencies
sudo apt install -y curl gnupg2 ca-certificates lsb-release apt-transport-httpsAdd Docker's Official GPG Key and Repository
curl -fsSL https://download.docker.com/linux/debian/gpg | sudo gpg --dearmor -o /usr/share/keyrings/docker.gpg

echo "deb [arch=$(dpkg --print-architecture) signed-by=/usr/share/keyrings/docker.gpg]
https://download.docker.com/linux/debian $(lsb_release -cs) stable" |
sudo tee /etc/apt/sources.list.d/docker.list > /dev/null
Update Package Lists and Install Docker
sudo apt update
sudo apt install -y docker-ce docker-ce-cli containerd.io docker-compose-plugin
Verify the Installation
docker --version
docker compose version
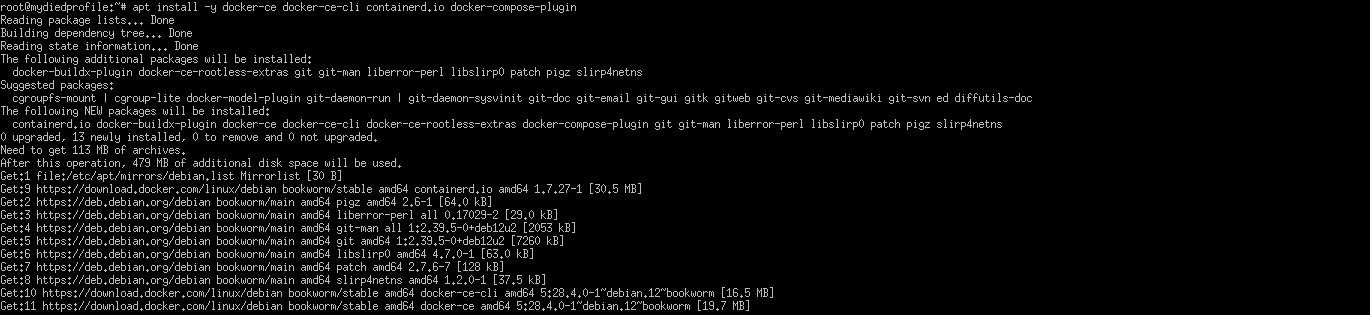
Expected output:
Docker version 25.0.3, build abc123
Docker Compose version v2.24.6
This confirms that Docker Engine and the Compose plugin are installed and ready to use.

Step 3: Prepare the Project Directory
Create a dedicated directory to store all n8n-related files, including configuration and persistent data:
mkdir ~/n8n && cd ~/n8nKeeping everything in one directory makes backups, updates, and migrations significantly easier.

Step 4: Generate an Encryption Key
n8n uses an encryption key to securely store all credentials (API tokens, passwords, OAuth secrets) in its internal database. Generate a strong, random key and save it to a file:
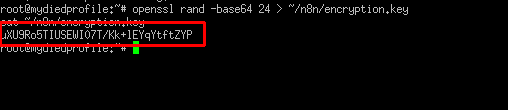
openssl rand -base64 24 > ~/n8n/encryption.key
cat ~/n8n/encryption.key
Important: Keep this key safe. If you lose it, you will not be able to decrypt your stored credentials. Consider backing it up to a secure location such as a password manager or encrypted storage.
Step 5: Create the Docker Compose Configuration
Now create the docker-compose.yml file that defines how n8n runs inside Docker:
nano docker-compose.ymlPaste the following configuration. Replace YOUR_SERVER_IP with your actual AlexHost VPS public IP address:
version: '3.7'

services:
  n8n:
    image: n8nio/n8n:latest
    restart: always
    ports:
      - "5678:5678"
    environment:
      - N8N_BASIC_AUTH_ACTIVE=true
      - N8N_BASIC_AUTH_USER=admin
      - N8N_BASIC_AUTH_PASSWORD=supersecretpassword
      - GENERIC_TIMEZONE=Europe/Chisinau
      - N8N_ENCRYPTION_KEY_FILE=/files/encryption.key
      - N8N_EDITOR_BASE_URL=http://YOUR_SERVER_IP:5678
      - N8N_SECURE_COOKIE=false
    volumes:
      - ./n8n_data:/home/node/.n8n
      - ./encryption.key:/files/encryption.key:ro
Save the file with CTRL + O, press Enter to confirm, then exit with CTRL + X.
Key Configuration Notes
| Variable | Purpose |
|---|---|
N8N_BASIC_AUTH_ACTIVE | Enables HTTP Basic Authentication to protect the editor |
N8N_BASIC_AUTH_USER | Username for basic auth login |
N8N_BASIC_AUTH_PASSWORD | Password — change this to a strong, unique value |
GENERIC_TIMEZONE | Sets the timezone for scheduled workflow triggers |
N8N_ENCRYPTION_KEY_FILE | Path to the encryption key file inside the container |
N8N_EDITOR_BASE_URL | The public URL used to access the n8n editor |
N8N_SECURE_COOKIE | Set to false for HTTP; set to true when using HTTPS with SSL |
> Security tip: For production deployments, configure a domain name, install an SSL Certificate, and set N8N_SECURE_COOKIE=true to encrypt all browser sessions.
Step 6: Adjust Directory Permissions
Create the persistent data directory and assign correct ownership so the n8n container process (which runs as user ID 1000) can read and write data:
mkdir -p ./n8n_data
sudo chown -R 1000:1000 ./n8n_data
Without this step, the container may fail to write workflow data and you will encounter permission errors in the logs.
Step 7: Start n8n
Launch the n8n container in detached (background) mode:
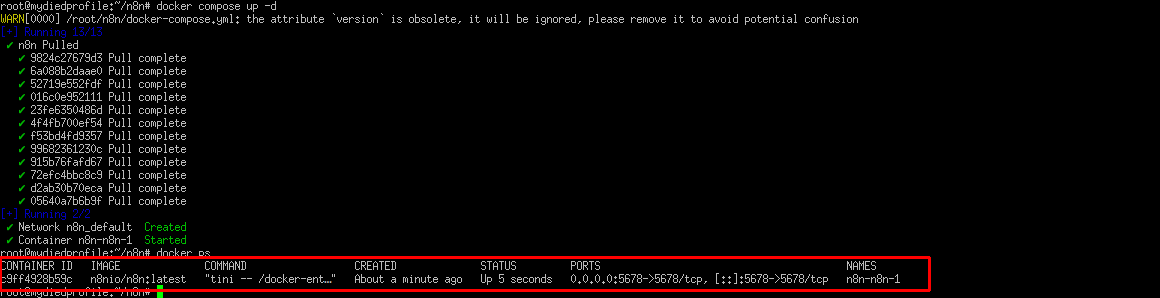
docker compose up -dExpected output:
[+] Running 2/2
 ✔ Network n8n_default     Created
 ✔ Container n8n-n8n-1     Started
Verify the Container Is Running
docker psYou should see n8n-n8n-1 listed with a status of Up and port 0.0.0.0:5678->5678/tcp mapped.
Step 8: Check the Logs
Before accessing the browser, verify that n8n started without errors:
docker logs -f n8n-n8n-1What to look for:
- No
mismatching encryption keyserrors - A confirmation message that the service is listening on port
5678 - No fatal startup exceptions
A healthy startup log will show n8n confirming it has loaded and is ready to accept connections. Press CTRL + C to stop following the log stream.
Step 9: Access n8n in the Browser
Open a web browser and navigate to your VPS IP address on port 5678:
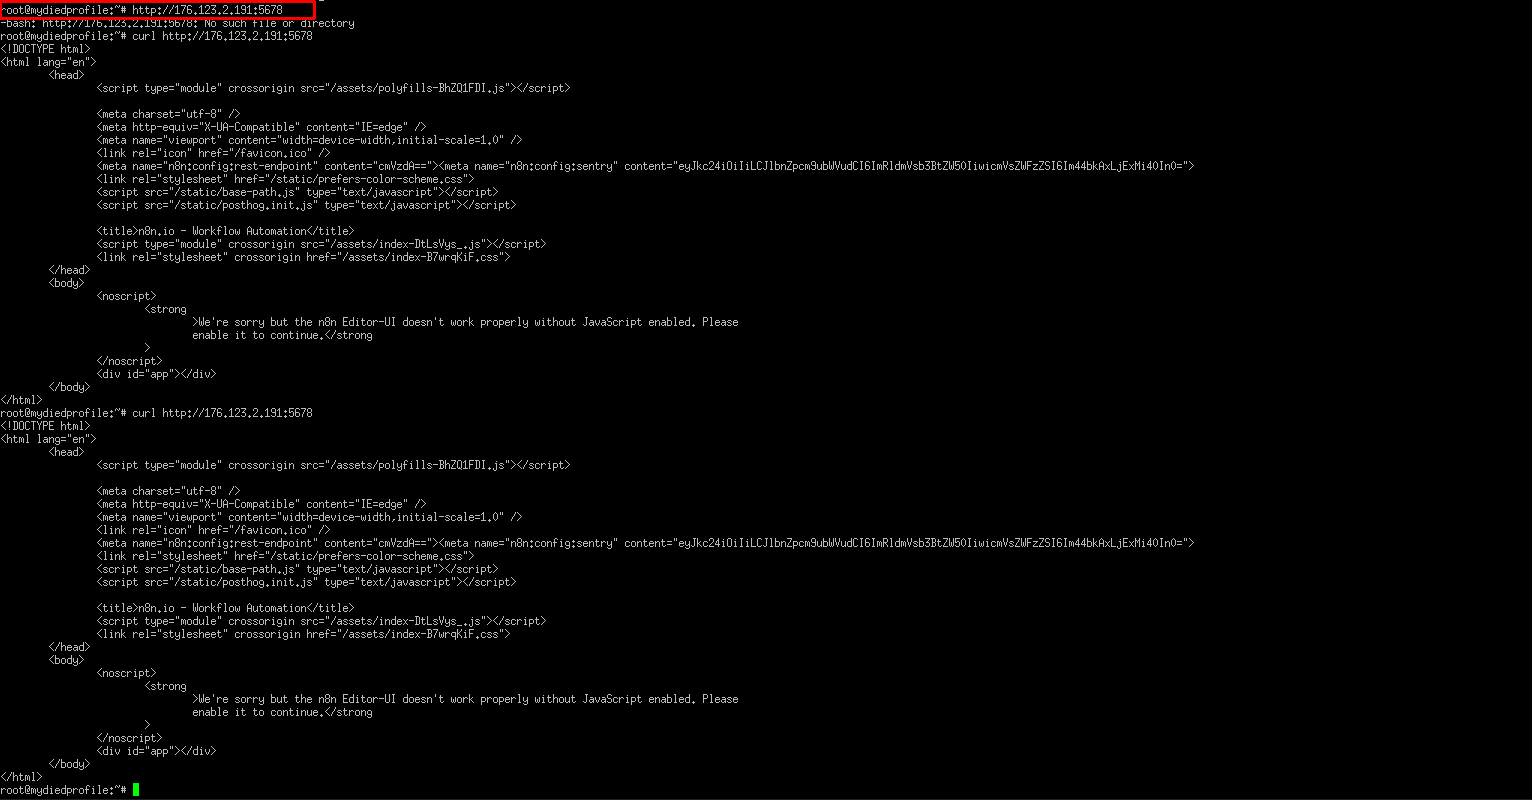
http://YOUR_SERVER_IP:5678For example:
http://176.123.2.191:5678Verifying Connectivity from the Command Line
If you cannot access a browser directly from your server environment, you can confirm n8n is responding using curl:
curl http://YOUR_SERVER_IP:5678This will return the raw HTML source of the n8n login page, including <script> tags and a notice that the UI requires JavaScript. This output confirms n8n is running correctly — however, since curl cannot execute JavaScript, you must open the URL in a real browser to use the visual editor.
First-Time Owner Account Setup
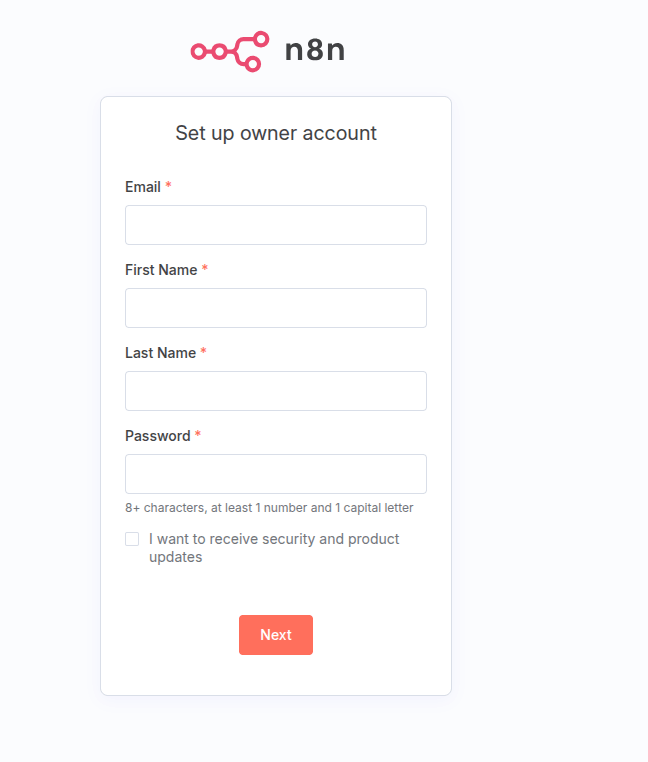
When you open the URL in a browser for the first time, you will see the n8n Owner Account Setup screen. This is the initial administrator registration page where you enter:
- Email address
- First name and last name
- A secure password
Once you complete this form and click Next, this account becomes the master owner of your n8n deployment, granting full access to the workflow editor, credentials manager, and all administrative settings. You can then immediately begin building and managing automation workflows in the n8n visual interface.
Production Hardening: Next Steps
Once your n8n instance is running, consider these additional steps to make it production-ready:
- Set up a reverse proxy – Use Nginx or Caddy to proxy traffic from port 80/443 to port 5678, enabling clean domain-based access.
- Install an SSL certificate – Secure all traffic with HTTPS. AlexHost offers SSL Certificates to protect your n8n instance and any other services running on your server.
- Register a domain name – Point a custom domain to your VPS for professional, memorable access. You can register one directly through Domain Registration.
- Configure a firewall – Use
ufwto restrict access to port 5678 from specific IP addresses only. - Set up automated backups – Regularly back up the
~/n8n/n8n_datadirectory and yourencryption.keyfile. - Enable email notifications – Connect n8n to an SMTP server or use Email Hosting to send workflow alerts and error notifications.
Choosing the Right Hosting for n8n
The performance and reliability of your n8n instance depend heavily on your underlying infrastructure. Here is a quick guide to choosing the right AlexHost plan:
| Use Case | Recommended Plan |
|---|---|
| Personal projects, small teams | VPS Hosting — affordable, flexible, full root access |
| High-traffic workflows, large integrations | Dedicated Servers — maximum performance, no shared resources |
| AI-powered automation nodes | GPU Hosting — ideal for ML model inference within workflows |
| Simple deployments with a control panel | VPS with cPanel — manage everything through a GUI |
Conclusion
Deploying n8n on a Debian 12 VPS is one of the smartest moves you can make for professional workflow automation. By self-hosting on an AlexHost VPS Hosting plan, you gain complete ownership of your data, unlimited workflow executions, and 24/7 availability — all at a predictable fixed cost.
The Docker-based installation process is straightforward and reproducible, making it easy to maintain, update, and scale your automation hub as your projects grow. With the addition of SSL certificates, a custom domain, and proper firewall rules, your n8n instance becomes a fully hardened, enterprise-grade automation platform that you control entirely.
Whether you are automating business processes, integrating APIs, or building complex multi-step workflows, running n8n on your own VPS gives you the freedom, security, and performance that no cloud-based subscription can match.