English
 Русский
  Română
  Deutsch
  Français
  Türkçe
  Español
  Português
  Українська
  български
  Polski
  Indonesia
  中文 (中国)


 on All Hosting Services
How to Create SSH Keys with OpenSSH on macOS or Linux
SSH key-based authentication is the industry-standard method for securing remote server access. Instead of transmitting a password over the network, your client proves its identity by solving a cryptographic challenge that only the holder of the private key can answer — the server never sees the private key itself.
An SSH key pair consists of two mathematically linked files: a private key (stored exclusively on your local machine, never shared) and a public key (deployed to every server you need to access). When you initiate a connection, OpenSSH uses a challenge-response handshake to verify that your private key corresponds to the public key on the server, granting access without a password prompt.
Why SSH Keys Are Strictly Superior to Password Authentication
Passwords are vulnerable to brute-force attacks, credential stuffing, phishing, and interception on poorly configured networks. SSH keys eliminate every one of those attack vectors simultaneously.
- Cryptographic strength: A 4096-bit RSA key or an Ed25519 key is computationally infeasible to brute-force with current hardware.
- No secret transmitted over the wire: The private key never leaves your machine. The authentication protocol proves possession without disclosure.
- Automation-ready: CI/CD pipelines, Ansible playbooks, rsync jobs, and cron-based backups all require non-interactive authentication. SSH keys make this possible without embedding plaintext passwords in scripts.
- Auditability: Each key pair can be uniquely identified by its fingerprint, making it straightforward to revoke a single compromised key without rotating credentials everywhere.
- Compatibility with
authorized_keysACLs: You can restrict a specific public key to run only one command, bind it to a source IP, or prevent port forwarding — controls that password auth cannot replicate.
If you are managing a VPS or a dedicated server, disabling password authentication entirely and enforcing key-only login is one of the highest-impact security hardening steps you can take.
Choosing the Right Key Algorithm
The original OpenSSH documentation and most legacy tutorials default to RSA. The field has moved on. Here is a precise comparison of every algorithm ssh-keygen supports today:
| Algorithm | Key Size | Security Level | Speed | Recommended Use Case |
|---|---|---|---|---|
| **Ed25519** | Fixed 256-bit | ~128-bit equivalent | Fastest | Default choice for all new keys |
| **ECDSA** | 256 / 384 / 521-bit | 128–260-bit equivalent | Fast | When Ed25519 is unavailable (legacy servers) |
| **RSA** | 2048–4096-bit | 112–140-bit equivalent | Slower | Compatibility with very old SSH daemons |
| **DSA** | Fixed 1024-bit | Broken | N/A | Do not use — deprecated in OpenSSH 7.0+ |
Ed25519 is the correct default in 2024. It produces shorter keys, signs faster, and its fixed key size eliminates the risk of accidentally generating an undersized key. RSA at 4096 bits remains acceptable for environments that must interoperate with older systems that predate Ed25519 support (OpenSSH < 6.5, released 2014).
Prerequisites
- A macOS or Linux workstation with OpenSSH installed. Both operating systems ship OpenSSH by default. Verify with:
ssh -V- Network access to a remote server where you have an account (root or unprivileged).
- Basic familiarity with a terminal.
On Linux distributions that ship a minimal install (Alpine, some Debian netinstalls), install the client tools with:
# Debian / Ubuntu
sudo apt install openssh-client

# RHEL / CentOS / AlmaLinux / Rocky
sudo dnf install openssh-clients
Step 1: Open a Terminal
macOS: Press Cmd + Space, type Terminal, and press Enter. Alternatively, navigate to Applications > Utilities > Terminal. Power users can use iTerm2 or the built-in terminal in VS Code.
Linux: Press Ctrl + Alt + T on most desktop environments, or launch your distribution's terminal emulator from the application menu.
Step 2: Generate the SSH Key Pair
Generating an Ed25519 Key (Recommended)
ssh-keygen -t ed25519 -C "your_email@example.com"The -C flag appends a human-readable comment to the public key. Use your email address, a hostname, or a descriptive label like "deploy-key-prod" — it has no cryptographic function but is invaluable when auditing authorized_keys files that accumulate dozens of entries.
Generating an RSA Key (Legacy Compatibility)
ssh-keygen -t rsa -b 4096 -C "your_email@example.com"Use -b 4096 explicitly. The historical default of 2048 bits is still technically acceptable but provides less margin against future advances in factoring algorithms. Never use -b 1024 or -b 2048 for new keys if 4096 is available.
Generating a Named Key for a Specific Host
When managing multiple servers or roles, use distinct key files rather than reusing one key everywhere. A compromised key then only affects the systems it was deployed to:
ssh-keygen -t ed25519 -f ~/.ssh/id_ed25519_prod_webserver -C "prod-webserver-2024"Step 3: Choose a Storage Location
After running ssh-keygen, you will see:
Generating public/private ed25519 key pair.
Enter file in which to save the key (/home/youruser/.ssh/id_ed25519):
Press Enter to accept the default (~/.ssh/id_ed25519 for Ed25519, ~/.ssh/id_rsa for RSA), or type a custom path. The default location is fine for a single general-purpose key. For role-specific keys, always specify a descriptive filename as shown in the previous step.
Critical file permission note: The ~/.ssh/ directory must be mode 700 and private key files must be mode 600. OpenSSH will refuse to use keys with overly permissive permissions and will print a warning. If you ever copy keys between machines, verify permissions immediately:
chmod 700 ~/.ssh
chmod 600 ~/.ssh/id_ed25519
chmod 644 ~/.ssh/id_ed25519.pub
Step 4: Set a Passphrase
Enter passphrase (empty for no passphrase):
Enter same passphrase again:
A passphrase encrypts the private key file on disk using AES-256-CBC (in modern OpenSSH). If an attacker obtains your private key file — through a stolen laptop, a compromised backup, or a misconfigured cloud snapshot — a strong passphrase is the last line of defense preventing them from using it.
When to skip the passphrase: Automated service accounts (deployment pipelines, backup agents) that run unattended legitimately need passphrase-free keys. In that case, restrict the key's permissions on the server side using authorized_keys options (see the advanced section below) and store the private key in a secrets manager rather than on a shared filesystem.
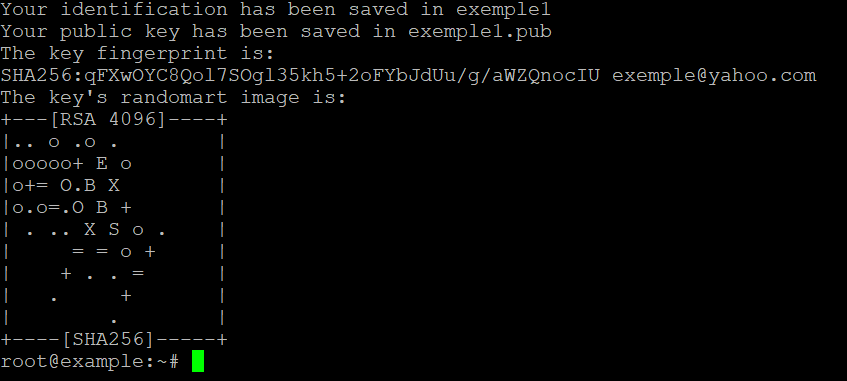
After confirming the passphrase, OpenSSH outputs the key fingerprint and a randomart image:
Your identification has been saved in /home/youruser/.ssh/id_ed25519
Your public key has been saved in /home/youruser/.ssh/id_ed25519.pub
The key fingerprint is:
SHA256:abc123XYZexampleFingerprint your_email@example.com
The key's randomart image is:
+--[ED25519 256]--+
|        .o+.     |
...
+----[SHA256]-----+
Record the fingerprint. You will use it to verify the key's identity when auditing servers.
Step 5: Copy the Public Key to the Remote Server
Method 1: ssh-copy-id (Fastest)
ssh-copy-id -i ~/.ssh/id_ed25519.pub user@your-server.comThe -i flag explicitly specifies which public key to copy, preventing ssh-copy-id from uploading every key in your agent. You will be prompted for the server's password once. The tool handles directory creation, file appending, and permission setting automatically.
Method 2: Manual Deployment (When ssh-copy-id Is Unavailable)
This is the correct approach when the remote system is Windows, a network device, or a container without ssh-copy-id on the path.
First, display your public key:
cat ~/.ssh/id_ed25519.pubCopy the entire output — it is a single line beginning with ssh-ed25519 (or ssh-rsa). Then log into the server and append it:
ssh user@your-server.comOnce connected:
mkdir -p ~/.ssh
chmod 700 ~/.ssh
echo "ssh-ed25519 AAAA...your-full-public-key... your_email@example.com" >> ~/.ssh/authorized_keys
chmod 600 ~/.ssh/authorized_keys
Common pitfall: Using > instead of >> overwrites the entire authorized_keys file, locking out every other key. Always use >> to append.
Method 3: Pipe Over SSH in One Command
If you already have password access and want to deploy without logging in interactively:
cat ~/.ssh/id_ed25519.pub | ssh user@your-server.com "mkdir -p ~/.ssh && chmod 700 ~/.ssh && cat >> ~/.ssh/authorized_keys && chmod 600 ~/.ssh/authorized_keys"Step 6: Test the Connection
ssh -i ~/.ssh/id_ed25519 user@your-server.comA successful connection without a password prompt (or with only a passphrase prompt for your local key) confirms the setup is correct. If the connection fails, run with verbose output to diagnose:
ssh -vvv -i ~/.ssh/id_ed25519 user@your-server.comThe -vvv flag prints the full negotiation log, showing exactly which key was offered, whether the server accepted it, and where the handshake failed.
Step 7: Configure ~/.ssh/config for Persistent Host Profiles
Typing the full ssh -i ~/.ssh/id_ed25519_prod_webserver user@203.0.113.45 every time is error-prone and slow. The SSH client configuration file eliminates this:
nano ~/.ssh/configAdd a host block:
Host prod-web
    HostName 203.0.113.45
    User deploy
    IdentityFile ~/.ssh/id_ed25519_prod_webserver
    Port 2222
    ServerAliveInterval 60
Now connect with simply:
ssh prod-webThis pattern scales cleanly to dozens of servers and is essential for any engineer managing infrastructure at scale. The ServerAliveInterval 60 directive sends a keepalive packet every 60 seconds, preventing idle connections from being dropped by firewalls — a common frustration on cloud providers.
Managing Multiple Keys with the SSH Agent
The SSH agent holds decrypted private keys in memory for the duration of your session, so you enter the passphrase once rather than on every connection.
Start the agent and add a key:
eval "$(ssh-agent -s)"
ssh-add ~/.ssh/id_ed25519
On macOS, you can persist keys across reboots by adding the following to ~/.ssh/config:
Host *
    AddKeysToAgent yes
    UseKeychain yes
    IdentityFile ~/.ssh/id_ed25519
The UseKeychain yes directive integrates with the macOS Keychain, storing the passphrase securely so it survives system restarts.
List all keys currently loaded in the agent:
ssh-add -lRemove a specific key from the agent:
ssh-add -d ~/.ssh/id_ed25519Advanced: Restricting Keys in authorized_keys
The authorized_keys file supports per-key options that dramatically reduce the blast radius of a compromised key. These are placed before the key type on the same line:
command="/usr/bin/rsync --server ...",no-pty,no-agent-forwarding,no-port-forwarding ssh-ed25519 AAAA... backup-key| Option | Effect |
|---|---|
| `command="…"` | Forces execution of a specific command only; ignores what the client requests |
| `no-pty` | Prevents allocation of an interactive terminal |
| `from="203.0.113.0/24"` | Restricts key usage to connections from a specific IP range |
| `no-port-forwarding` | Blocks TCP tunneling through this key |
| `expiry-time="20251231"` | Key automatically stops working after the specified date (OpenSSH 8.2+) |
These options are particularly valuable for deployment keys on dedicated servers where a single compromised CI/CD key should not grant full shell access.
Hardening the SSH Daemon After Key Deployment
Once key-based authentication is working, disable password authentication entirely on the server. Edit /etc/ssh/sshd_config:
sudo nano /etc/ssh/sshd_configSet the following directives:
PasswordAuthentication no
ChallengeResponseAuthentication no
PermitRootLogin prohibit-password
AuthenticationMethods publickey
Reload the daemon without disconnecting your current session:
sudo systemctl reload sshdDo not close your existing SSH session before testing a new connection in a separate terminal. A misconfiguration that locks you out is recoverable from the console, but it is disruptive and avoidable.
For servers running cPanel VPS environments, be aware that some cPanel versions manage their own SSH configuration. Verify that sshd_config changes persist after cPanel updates by checking /etc/ssh/sshd_config.d/ for override files.
Rotating and Revoking SSH Keys
Key rotation is a security hygiene practice that limits the window of exposure if a key is silently compromised. A practical rotation schedule is every 12 months for personal keys and every 90 days for service account keys.
To revoke a key: Remove its line from ~/.ssh/authorized_keys on every server where it was deployed. There is no central revocation mechanism in standard OpenSSH — this is why maintaining an inventory of where each key fingerprint is deployed matters.
To rotate a key:
- Generate a new key pair.
- Deploy the new public key to all target servers.
- Test connectivity with the new key.
- Remove the old public key from all
authorized_keysfiles. - Delete or archive the old private key locally.
For environments with VPS hosting across multiple regions, a configuration management tool like Ansible is the practical solution for propagating key rotations at scale.
Transferring Keys Between Machines
When you set up a new workstation, you need to migrate your existing private keys rather than generating new ones (which would require re-deploying public keys everywhere).
Copy the private key securely using scp or rsync over SSH:
scp ~/.ssh/id_ed25519 newmachine.local:~/.ssh/id_ed25519Alternatively, use an encrypted USB drive or a password manager that supports SSH key storage (1Password, Bitwarden, and HashiCorp Vault all support this). Never email private keys or store them in unencrypted cloud storage.
After transfer, immediately verify permissions on the new machine:
chmod 600 ~/.ssh/id_ed25519Verifying a Server's Host Key Fingerprint
The first time you connect to a server, OpenSSH presents the server's host key fingerprint and asks you to confirm it:
The authenticity of host '203.0.113.45 (203.0.113.45)' can't be established.
ED25519 key fingerprint is SHA256:abc123XYZexample.
Are you sure you want to continue connecting (yes/no/[fingerprint])?
Never type yes blindly. Obtain the expected fingerprint through an out-of-band channel — your hosting provider's control panel, a colleague who provisioned the server, or the server's console output. This step prevents man-in-the-middle attacks. For shared hosting environments, the expected fingerprint is typically listed in the control panel under SSH access settings.
Once accepted, the fingerprint is stored in ~/.ssh/known_hosts. If the fingerprint changes unexpectedly on a subsequent connection, OpenSSH will refuse to connect and display a warning — treat this as a serious security event requiring investigation before proceeding.
Decision Matrix and Technical Checklist
Use this checklist before considering your SSH key setup production-ready:
- [ ] Key algorithm is Ed25519 (or RSA 4096 for legacy compatibility) — DSA and ECDSA 256 are not acceptable for new deployments
- [ ] Private key file permissions are
600;~/.ssh/directory permissions are700 - [ ] A strong passphrase is set on all interactive user keys
- [ ] Service account keys without passphrases are restricted via
authorized_keysoptions (command=,from=,no-pty) - [ ]
PasswordAuthentication nois set in/etc/ssh/sshd_configon all servers - [ ]
PermitRootLogin prohibit-passwordorPermitRootLogin nois enforced - [ ] Server host key fingerprints have been verified out-of-band
- [ ] A key inventory exists mapping each fingerprint to the servers where it is deployed
- [ ] Key rotation schedule is defined and calendared
- [ ]
~/.ssh/confighost blocks are configured to avoid manual-iflag usage - [ ] SSH agent is used to avoid repeated passphrase entry during work sessions
- [ ]
known_hostsentries are reviewed periodically for stale or unexpected entries
FAQ
What is the difference between Ed25519 and RSA SSH keys?
Ed25519 uses elliptic curve cryptography with a fixed 256-bit key that provides approximately 128 bits of security, signs operations faster than RSA, and produces shorter key strings. RSA at 4096 bits provides comparable security but is slower and generates larger key material. Use Ed25519 for all new keys unless you must connect to a system running OpenSSH older than version 6.5.
Can I use the same SSH key pair for multiple servers?
Yes, technically. However, best practice is to use distinct key pairs per role or environment (personal workstation access, CI/CD deployment, database maintenance). This limits the impact of a single compromised key and makes revocation straightforward without disrupting unrelated systems.
What happens if I lose my private key?
You lose the ability to authenticate using that key pair. The public key on the server becomes useless. You must access the server through an alternative method — console access, a secondary key, or your hosting provider's emergency access — then remove the orphaned public key from authorized_keys and deploy a new key pair.
Why does SSH still ask for a password after I copy my public key?
The most common causes are: incorrect permissions on ~/.ssh/ (must be 700) or ~/.ssh/authorized_keys (must be 600) on the server; the home directory itself being world-writable; SELinux or AppArmor blocking access to the .ssh directory; or PubkeyAuthentication no being set in /etc/ssh/sshd_config. Run ssh -vvv to identify exactly which authentication method is being attempted and rejected.
How do I remove an SSH key from a server I no longer have access to?
If you have no other authentication method, contact your hosting provider's support team or use out-of-band console access (available for VPS and dedicated server customers) to log in and edit ~/.ssh/authorized_keys directly. This is why maintaining console access credentials separately from SSH keys is a non-negotiable operational requirement.