How to connect to your Windows 10/11 VPS using Linux OS
If you’ve chosen Windows 10 or Windows 11 as your operating system in the OS Template section, it’s crucial to understand the proper steps for connecting to your server using these versions. This guide is designed to walk you through the process, ensuring that you can seamlessly access and manage your VPS with ease. Windows 10 and 11 come with built-in features and tools that make remote server management straightforward, but following the correct procedures is essential to avoid potential issues.
Once your VPS has been successfully installed, AlexHost will send you an email containing all the necessary credentials, including your server’s IP address, username, and password. These details are sent to the email address associated with your AlexHost account, so it’s important to check your inbox and ensure you have received this information before proceeding.
After receiving your credentials, you’ll need to use Remote Desktop Protocol (RDP) to connect to your server. Windows 10 and 11 have an RDP client pre-installed, making the connection process relatively simple. However, ensuring that you have a stable internet connection and that your local firewall settings allow RDP connections is essential.
This guide will not only explain how to input your credentials correctly but will also cover additional security settings, such as changing the default RDP port and enabling Windows Firewall to protect your server from unauthorized access. By the end of this guide, you’ll be well-equipped to manage your server effectively, ensuring it runs smoothly and securely.
If you’re using Linux OS on your desktop
If you are using Linux OS on your desktop, we advise you to consider connecting via the Remmina remote access screen. Below are the steps to properly connect to Windows VPS 10 and 11 versions.
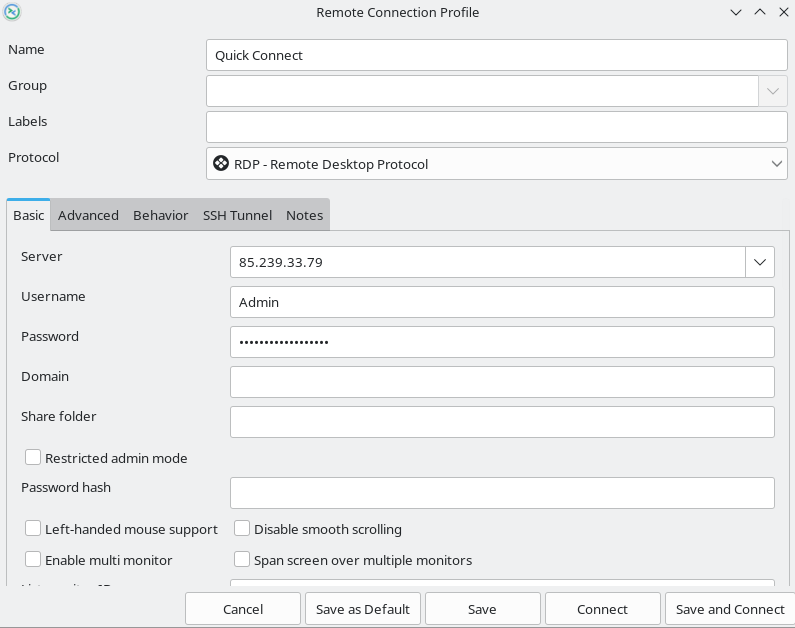
First of all, open Remmina and go here to the new connection section

Then you should enter the IPv4 address and password that you will receive in your email after the successful activation of your Windows VPS

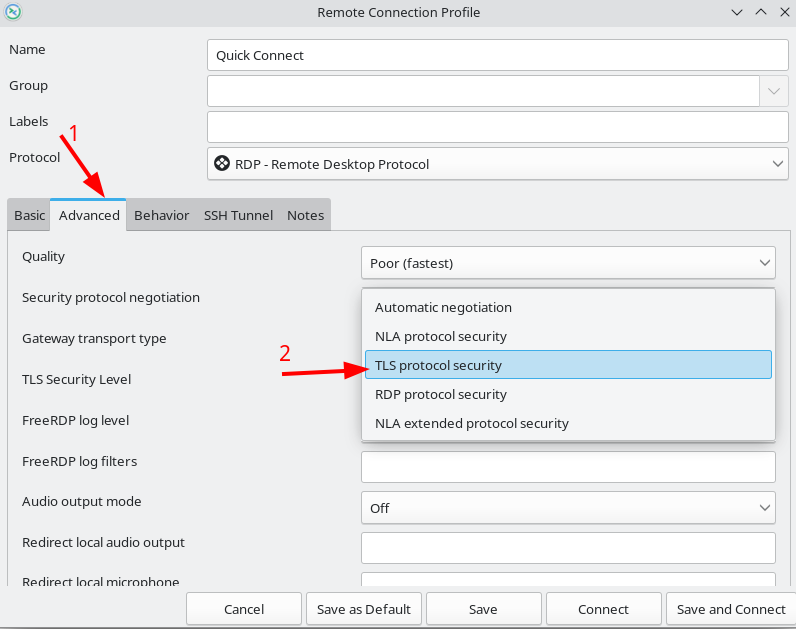
Then select the Advanced section and the TLS protocol security option

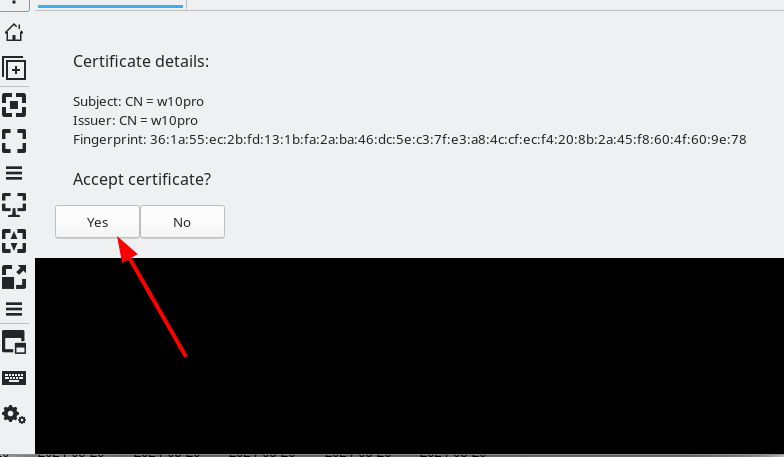
After that you need to accept the certificate

The following message will appear “The user’s password must be changed before signing in”

After which a special window will appear to set a new administrator password. Here you need to set up the new password and continue with the enter

Now you have successfully logged into your Windows server with the new password and can use it.


