English
 Русский
  Română
  Deutsch
  Français
  Türkçe
  Español
  Português
  Українська
  български
  Polski
  Indonesia
  中文 (中国)


 on All Hosting Services
How to Install CloudPanel on Ubuntu & Debian VPS
CloudPanel is a free, open-source server control panel engineered for high-performance VPS environments. Unlike heavyweight panels such as cPanel or Plesk, it is built on a lightweight technology stack — Nginx, PHP-FPM, and either MySQL 8.0 or MariaDB — designed to minimize resource overhead while delivering enterprise-grade server management capabilities.
This guide walks you through a complete, production-ready installation of CloudPanel on Ubuntu 22.04 or Debian 11, covering system requirements, database engine selection, SHA-256 checksum verification, and post-install access configuration.

What Is CloudPanel and Why Use It on a VPS
CloudPanel (CE — Community Edition) is a modern control panel that runs entirely on your own server infrastructure. It is not a SaaS product, which means there are no per-site licensing fees, no vendor lock-in, and no external dependency on a third-party platform’s uptime.
Its core architecture is built around three pillars:
- Web server management: Native support for Nginx with pre-configured virtual host templates optimized for WordPress, Node.js, Python, and static sites.
- Database management: Integrated GUI for creating, modifying, and dropping MySQL or MariaDB databases, managing users, and adjusting privileges — without needing direct CLI access.
- User and permissions isolation: Each site runs under its own system user with isolated file permissions, reducing the blast radius of any single compromised application.
Additional capabilities include Let’s Encrypt SSL automation, PHP version switching per site (from PHP 7.1 through 8.3), SSH/SFTP access management, Varnish Cache integration, Redis and Memcached support, and a built-in firewall manager powered by UFW.
CloudPanel vs. Other Control Panels
Before committing to any control panel, it is worth understanding how CloudPanel positions itself against the most common alternatives in the self-managed VPS space.
| Feature | CloudPanel | cPanel/WHM | Plesk | Webmin/Virtualmin |
|---|---|---|---|---|
| License cost | Free (CE) | Paid (from ~$20/mo) | Paid (from ~$12/mo) | Free |
| Minimum RAM | 2 GB | 1 GB (4 GB recommended) | 1 GB (2 GB recommended) | 512 MB |
| Web server | Nginx (primary) | Apache (primary) | Apache or Nginx | Apache (primary) |
| PHP version switching | Per-site, GUI | Per-account, GUI | Per-domain, GUI | Manual/CLI |
| Let’s Encrypt | Built-in, automated | Built-in | Built-in | Plugin-based |
| Node.js / Python apps | Native support | Limited | Extension-based | Manual |
| Multi-server management | No | Yes (WHM) | Yes (Plesk Obsidian) | No |
| Resource footprint | Very low | High | Medium | Low |
| Target user | Developers, sysadmins | Shared hosting providers | Agencies, resellers | Advanced Linux users |
CloudPanel’s strongest competitive advantage is its zero-cost licensing combined with a genuinely modern stack. On a VPS Hosting plan with 2–4 GB of RAM, it runs efficiently without consuming the majority of available memory just to keep the panel itself operational — a real problem with cPanel on entry-level servers.
System Requirements
CloudPanel v2 officially supports the following distributions:
- Ubuntu 22.04 LTS (recommended for most production deployments)
- Debian 11 (Bullseye)
Minimum hardware requirements:
- vCPU: 1 core (2+ recommended for production workloads)
- RAM: 2 GB minimum (4 GB recommended if running multiple sites or a Node.js/Python application)
- Disk: 10 GB minimum (SSD strongly preferred; NVMe for I/O-intensive databases)
- Network: A static public IP address
Important: CloudPanel must be installed on a clean, freshly provisioned server. Running the installer on a system that already has Apache, Nginx, MySQL, or another control panel installed will cause port conflicts and installation failures. Always start from a minimal OS image.
If you are on a constrained entry-level plan, verify your resource allocation before proceeding. The panel’s PHP-FPM pools, Nginx worker processes, and database engine together consume approximately 400–600 MB of RAM at idle on a clean install.
Step 1: Log In to Your VPS via SSH
Connect to your server as the root user. If your server uses password authentication:
ssh root@yourIpAddressIf you have configured SSH key-based authentication (strongly recommended for any production server), the command is:
ssh -i /path/to/your/private_key root@yourIpAddressReplace yourIpAddress with your server’s actual public IPv4 address. Once logged in, verify you are running the correct OS version:
lsb_release -aStep 2: Update the System and Install Prerequisites
Before running any installer script, bring the system fully up to date and ensure the required utilities are present:
apt update && apt -y upgrade && apt -y install curl wget sudoThis step is non-optional. The CloudPanel installer pulls packages from external repositories and requires curl for the download, wget as a fallback fetcher, and sudo for privilege escalation within the install script. Running the installer on an outdated system can result in dependency conflicts, particularly around libssl versions on Debian 11.
Pro tip: After the upgrade, if a kernel update was applied, reboot the server before proceeding:
rebootReconnect via SSH after approximately 60 seconds.
Step 3: Choose Your Database Engine
CloudPanel supports three database backends. Your choice here is permanent for the lifetime of this installation — migrating between database engines after installation requires a full reinstall and data migration. Choose deliberately.
MySQL 8.0
MySQL 8.0 is the default and the most widely supported option. It offers superior JSON support, window functions, and improved InnoDB performance. It is the recommended choice for WordPress, Laravel, and most PHP applications.
MariaDB 10.11
MariaDB 10.11 is a long-term support (LTS) release with strong Galera Cluster compatibility and slightly better performance on certain write-heavy workloads. It is the preferred choice if you plan to run Galera replication or if your application stack explicitly requires MariaDB.
MariaDB 10.6
MariaDB 10.6 is an older LTS release. It is suitable if you are migrating an existing application from a legacy environment that was already running MariaDB 10.6 and you need to avoid schema compatibility issues during migration.
Step 4: Run the CloudPanel Installer
All three installer commands use the same script file. The SHA-256 checksum is verified before execution — this is a critical security step that ensures the downloaded script has not been tampered with or corrupted in transit.
Install with MySQL 8.0
curl -sS https://installer.cloudpanel.io/ce/v2/install.sh -o install.sh;
echo "3c30168958264ced81ca9b58dbc55b4d28585d9066b9da085f2b130ae91c50f6 install.sh" |
sha256sum -c && sudo bash install.sh
Install with MariaDB 10.11
curl -sS https://installer.cloudpanel.io/ce/v2/install.sh -o install.sh;
echo "3c30168958264ced81ca9b58dbc55b4d28585d9066b9da085f2b130ae91c50f6 install.sh" |
sha256sum -c && sudo DB_ENGINE=MARIADB_10.11 bash install.sh
Install with MariaDB 10.6
curl -sS https://installer.cloudpanel.io/ce/v2/install.sh -o install.sh;
echo "3c30168958264ced81ca9b58dbc55b4d28585d9066b9da085f2b130ae91c50f6 install.sh" |
sha256sum -c && sudo DB_ENGINE=MARIADB_10.6 bash install.sh
Understanding the checksum verification: The sha256sum -c command computes a SHA-256 hash of the downloaded install.sh file and compares it against the expected value provided inline. If the hashes do not match, the command chain stops and the installer never executes. This protects against man-in-the-middle attacks and corrupted downloads. If you see a FAILED message from sha256sum, do not proceed — re-download the script and verify your network connection.
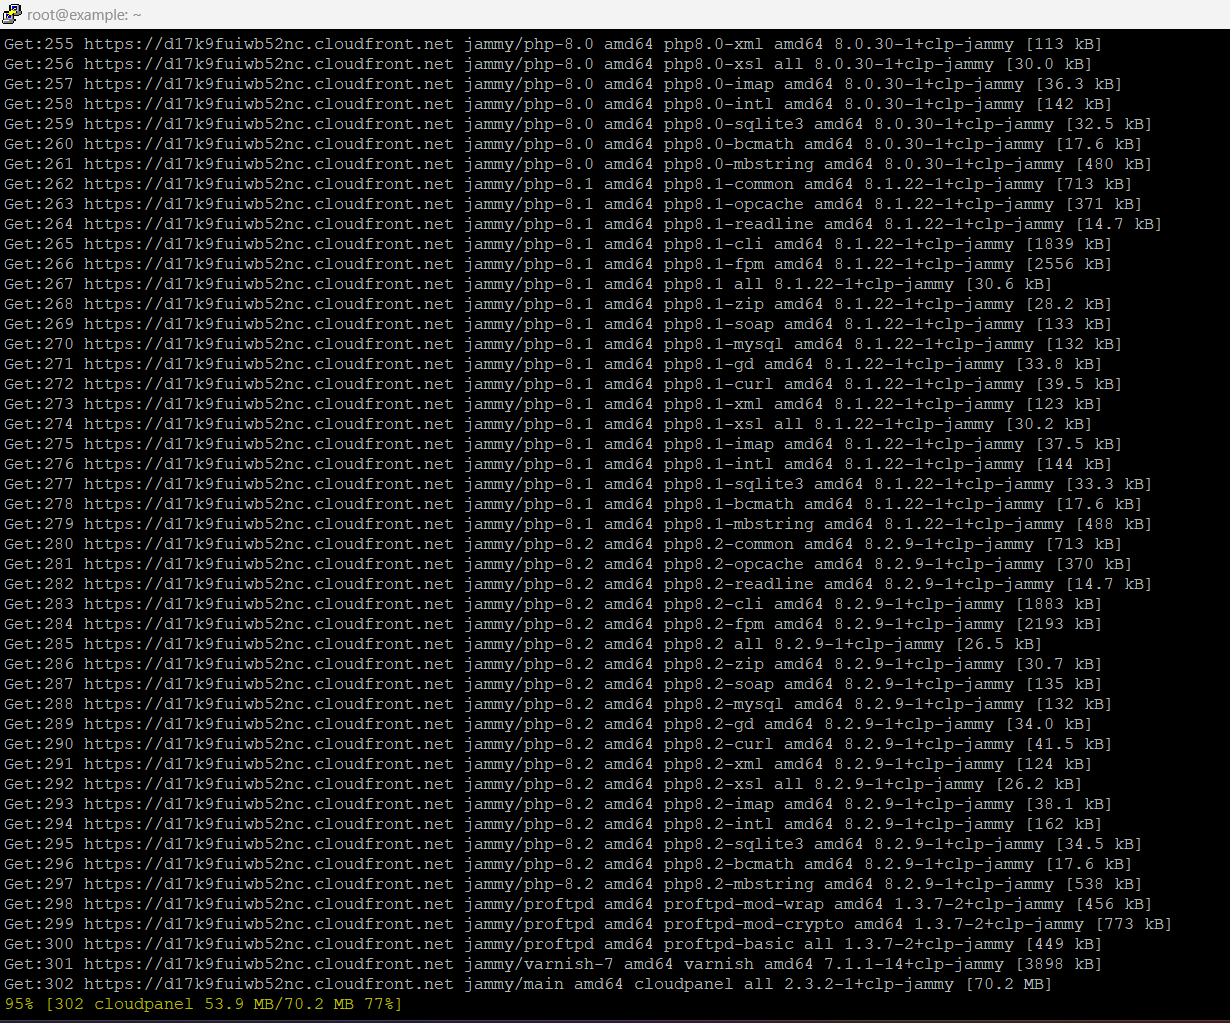
The installation process takes approximately 10–20 minutes depending on your server’s CPU speed, RAM, and network throughput to the package repositories. The installer will:
- Configure APT repositories for Nginx, PHP, and the selected database engine
- Install and configure all required system packages
- Set up CloudPanel’s internal SQLite database for panel configuration
- Configure UFW firewall rules (ports 22, 80, 443, 8443)
- Generate a self-signed TLS certificate for the panel’s management interface
- Start all required system services
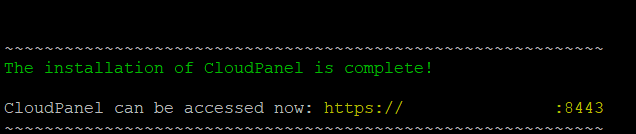
Step 5: Access the CloudPanel Web Interface
Once the installer completes successfully, access the panel via your browser using HTTPS on port 8443:
https://yourIpAddress:8443Your browser will display a TLS certificate warning because the panel uses a self-signed certificate by default. This is expected behavior. Proceed past the warning (in Chrome: “Advanced” > “Proceed to yourIpAddress”).
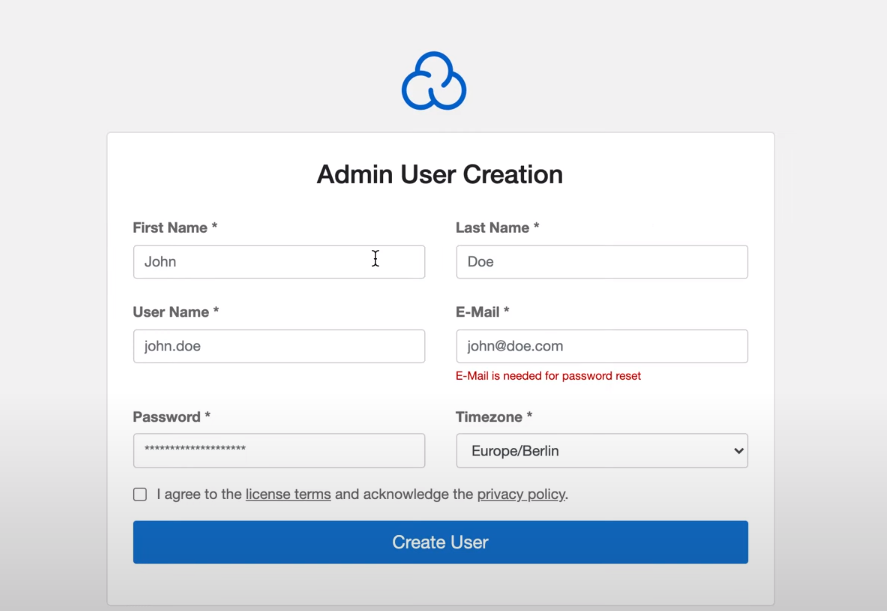
First-time setup: You will be prompted to create the initial administrator account. Provide:
- A username (avoid using
adminorroot— choose something non-obvious) - A valid email address
- A strong password (minimum 16 characters, mixed case, numbers, and symbols)
- Accept the license terms and privacy policy
After completing this form, you will be redirected to the CloudPanel dashboard.
Post-Installation: Critical Configuration Steps
The installer gets CloudPanel running, but a production-ready server requires several additional hardening and configuration steps.
Replace the Self-Signed Certificate
The management interface on port 8443 uses a self-signed certificate. To replace it with a trusted certificate, add a domain pointing to your server’s IP, create a site in CloudPanel for that domain, issue a Let’s Encrypt certificate for it, and then configure CloudPanel to use that certificate for the panel interface under Admin Area > SSL/TLS.
For sites hosted behind the panel, CloudPanel automates Let’s Encrypt issuance per-site. If you need extended validation or organization-validated certificates, consider a dedicated SSL Certificates solution.
Configure the Firewall
CloudPanel’s built-in firewall manager (UFW wrapper) is accessible under Admin Area > Security. By default, it opens ports 22 (SSH), 80 (HTTP), 443 (HTTPS), and 8443 (CloudPanel UI). Restrict port 8443 to your office or home IP address using an IP allowlist rule — this is one of the most effective steps you can take to reduce attack surface on the management interface.
Set Up Automated Backups
CloudPanel includes a backup configuration section under Admin Area > Backups. Configure remote backup destinations (AWS S3, Wasabi, or any S3-compatible storage) for both site files and databases. Do not rely on local backups alone — a disk failure or accidental rm -rf will destroy both your data and your backup simultaneously.
Harden SSH
Disable password-based SSH authentication if you have not already done so:
sed -i 's/^PasswordAuthentication yes/PasswordAuthentication no/' /etc/ssh/sshd_config
systemctl restart sshd
Ensure your SSH public key is in /root/.ssh/authorized_keys before executing this command.
Common Installation Errors and How to Fix Them
Error: sha256sum: WARNING: 1 computed checksum did NOT match
The downloaded script is corrupted or the checksum in the documentation has been updated. Re-run the curl command to re-download the script, and verify the expected checksum against the official CloudPanel documentation before proceeding.
Error: Port 8443 is unreachable after installation
Check whether UFW is blocking the port: ufw status. If UFW is inactive, the firewall is not the issue — check whether the CloudPanel service is running: systemctl status clp. Also verify that your hosting provider’s external firewall or security group (if applicable) permits inbound traffic on TCP 8443.
Error: E: Package 'nginx' has no installation candidate'
This typically occurs when the system’s APT cache is stale or the OS version is not supported. Confirm you are running Ubuntu 22.04 or Debian 11 with lsb_release -a and re-run apt update before the installer.
Error: Installer exits with a MySQL/MariaDB conflict
This happens when a previous MySQL or MariaDB installation exists on the server. CloudPanel’s installer is not designed to upgrade or coexist with existing database installations. Provision a fresh server.
Scaling Beyond a Single CloudPanel Instance
CloudPanel is designed as a single-server control panel. It does not natively support multi-server management or horizontal scaling. For teams that outgrow a single VPS, the typical progression is:
- Vertical scaling: Upgrade to a larger VPS or move to a Dedicated Servers plan for full hardware isolation, predictable I/O performance, and no noisy-neighbor effects.
- Database separation: Move the MySQL/MariaDB instance to a dedicated database server and point CloudPanel’s sites at the remote host. This is supported natively in CloudPanel’s site configuration.
- Object storage offloading: Offload static assets and media uploads to S3-compatible object storage to reduce local disk I/O and simplify backup scope.
- GPU workloads: If your application stack includes machine learning inference, image processing, or video transcoding, a GPU Hosting environment handles those workloads without burdening the web server.
For teams managing multiple client sites, CloudPanel’s multi-user system allows you to create isolated user accounts per client, each with access only to their own sites and databases — a practical alternative to paying for a reseller hosting tier on a Shared Web Hosting platform.
If you need a panel environment with cPanel specifically — for compatibility with existing client workflows or migration from another host — VPS with cPanel is a separate, purpose-built configuration that handles cPanel licensing and integration.
Decision Checklist Before Going Live
Use this checklist to confirm your CloudPanel installation is production-ready:
- [ ] OS is Ubuntu 22.04 or Debian 11 on a clean, minimal image
- [ ] All system packages updated before running the installer
- [ ] SHA-256 checksum verified successfully before script execution
- [ ] Database engine selected based on application requirements (not default assumption)
- [ ] Administrator account uses a non-obvious username and a strong password
- [ ] Port 8443 restricted to trusted IP addresses via CloudPanel firewall rules
- [ ] SSH password authentication disabled; key-based auth confirmed working
- [ ] Let’s Encrypt certificates issued for all hosted domains
- [ ] Remote backup destination configured and first backup verified
- [ ] Monitoring or uptime alerting configured (e.g., UptimeRobot, Netdata, or Prometheus)
Frequently Asked Questions
Is CloudPanel completely free, including for commercial use?
Yes. CloudPanel Community Edition is released under the MIT license and is free for personal and commercial use with no per-site or per-domain fees. There is no paid tier — the CE version is the only version.
Can I install CloudPanel on an existing server that already has websites running?
No. The installer requires a clean OS environment. Installing CloudPanel on a server with existing Nginx, Apache, MySQL, or PHP installations will cause conflicts. Migrate your sites to a new server provisioned specifically for CloudPanel.
What happens if the SHA-256 checksum verification fails?
The && operator in the install command ensures the bash install.sh command only executes if sha256sum -c exits with a success code. A checksum mismatch will halt execution before the installer runs. Re-download the script and cross-reference the expected hash with the official CloudPanel GitHub repository.
Does CloudPanel support email hosting?
CloudPanel does not include a built-in mail server. For production email, use a dedicated Email Hosting service or deploy a separate mail stack (Postfix + Dovecot + Rspamd) on a different server or IP address to avoid deliverability issues caused by shared IP reputation.
How do I update CloudPanel after installation?
CloudPanel can be updated via the Admin Area UI under Admin Area > CloudPanel > Update, or via the CLI using clpctl cloudpanel:update. Always review the changelog before updating in production and take a full server snapshot or backup immediately beforehand.