English
 Русский
  Română
  Deutsch
  Français
  Türkçe
  Español
  Português
  Українська
  български
  Polski
  Indonesia
  中文 (中国)


 on All Hosting Services
How to Enable Two-Factor Authentication (2FA) on AlexHost
Two-factor authentication (2FA) is a security mechanism that requires users to verify their identity through two independent factors before gaining access to an account: something they know (a password) and something they have (a time-based one-time code from an authenticator app). Enabling 2FA on your AlexHost account means that even if your password is compromised through phishing, credential stuffing, or a data breach, an attacker still cannot access your account without physical possession of your enrolled device.
This guide walks through the exact steps to activate 2FA on AlexHost using Google Authenticator, explains the underlying TOTP protocol, and covers edge cases and recovery scenarios that most tutorials omit.
Why 2FA Is Non-Negotiable for Hosting Accounts
Hosting control panels are high-value targets. A compromised hosting account gives an attacker access to live websites, databases, DNS records, email configurations, and billing data. Password-only authentication is insufficient against modern threats including:
- Credential stuffing attacks — automated tools that test leaked username/password pairs from other breaches
- Phishing campaigns — fake login pages that harvest credentials in real time
- Man-in-the-middle interception — particularly on unsecured networks
- Brute-force attacks — systematic password guessing against weak or reused credentials
2FA neutralizes all of these vectors at the authentication layer. Even a perfectly captured password becomes useless without the rotating 6-digit TOTP code generated on your device.
This is especially critical if you manage a VPS Hosting environment or a Dedicated Server, where a single compromised account can expose entire server infrastructure, client data, and hosted services.
How TOTP-Based 2FA Works
AlexHost uses the Time-Based One-Time Password (TOTP) standard, defined in RFC 6238. Understanding the mechanism helps you troubleshoot issues and make informed decisions about your security posture.
The TOTP flow:
- During setup, the server generates a shared secret key (typically 160-bit, encoded as a Base32 string or QR code).
- Your authenticator app stores this secret locally on your device.
- Every 30 seconds, both the server and your app independently compute
HMAC-SHA1(secret, floor(current_unix_time / 30))and extract a 6-digit code from the result. - Because both sides use the same secret and the same timestamp, the codes match — without any network communication between the app and the server at login time.
This means the authenticator app works completely offline. No SMS, no internet connection, and no carrier dependency is required once setup is complete.
Supported Authenticator Apps
Google Authenticator is the recommended option for AlexHost 2FA, but any RFC 6238-compliant TOTP app works with the same QR code. Consider the following options based on your requirements:
| App | Platform | Cloud Backup | Multi-Device Sync | Open Source |
|---|---|---|---|---|
| Google Authenticator | Android, iOS | Yes (Google Account) | Yes | No |
| Authy | Android, iOS, Desktop | Yes (Authy Cloud) | Yes | No |
| Microsoft Authenticator | Android, iOS | Yes (Microsoft Account) | Yes | No |
| Aegis Authenticator | Android only | Manual export | No | Yes |
| Bitwarden (built-in TOTP) | All platforms | Yes (Bitwarden vault) | Yes | Yes |
Key consideration: Google Authenticator added Google Account-based backup in 2023. If you use an older version without backup enabled, losing your device means losing access to all enrolled accounts. Enable cloud backup or export your TOTP secrets before you need to.
Step-by-Step: Enabling 2FA on Your AlexHost Account
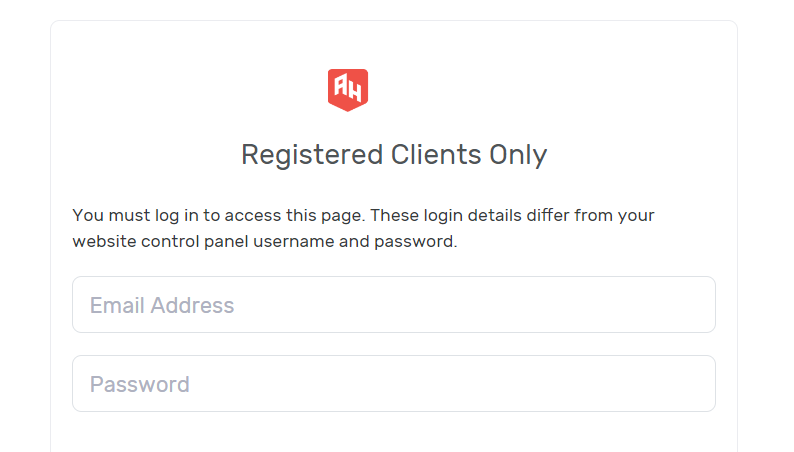
Step 1: Log In to Your AlexHost Client Area
Navigate to alexhost.com and sign in using your registered email address and password. If you do not yet have an account, registration is available directly on the AlexHost website.
Ensure you are logging in from a trusted network. Avoid enabling 2FA for the first time on a public or shared Wi-Fi connection, as the QR code displayed during setup contains your raw TOTP secret.
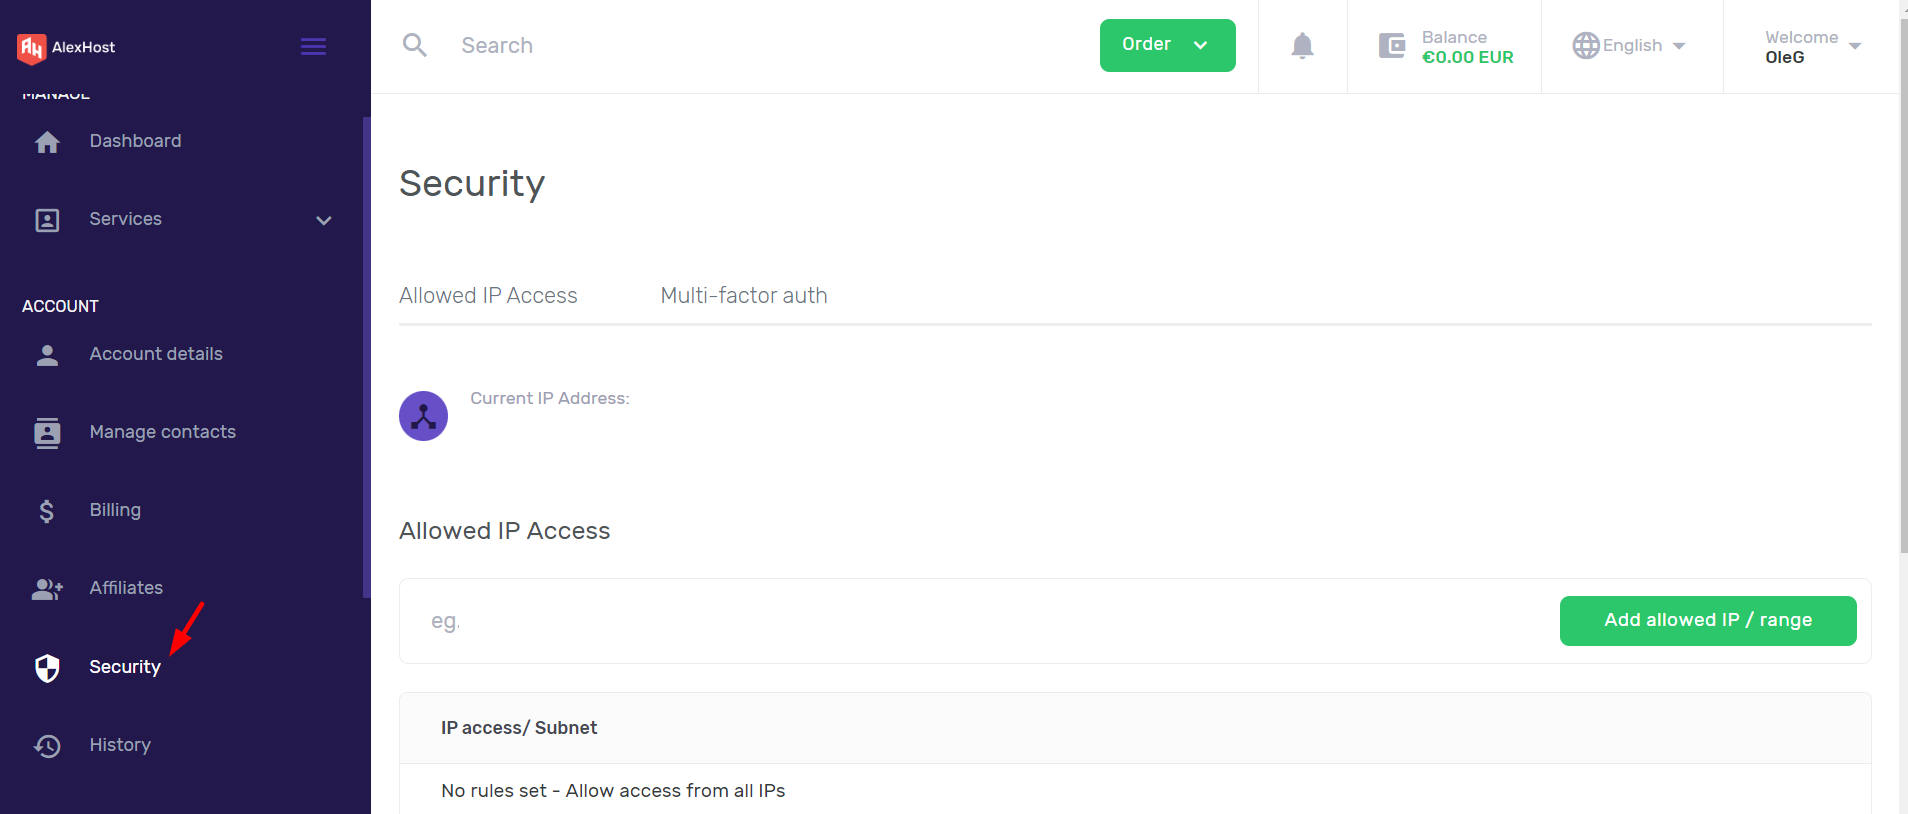
Step 2: Navigate to Security Settings
Once logged in, locate your account menu — typically accessible via your username or avatar in the top-right corner of the dashboard. Select Security Settings or Account Settings from the dropdown.
This section centralizes all authentication controls for your account, including password management and multi-factor authentication options.
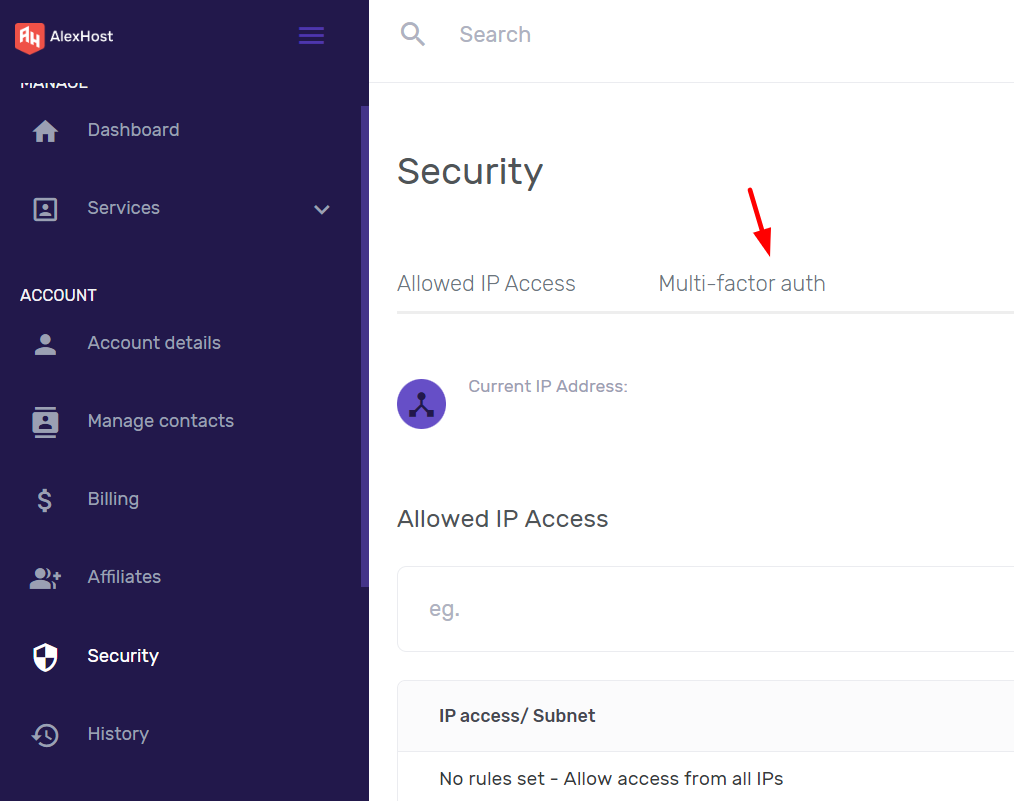
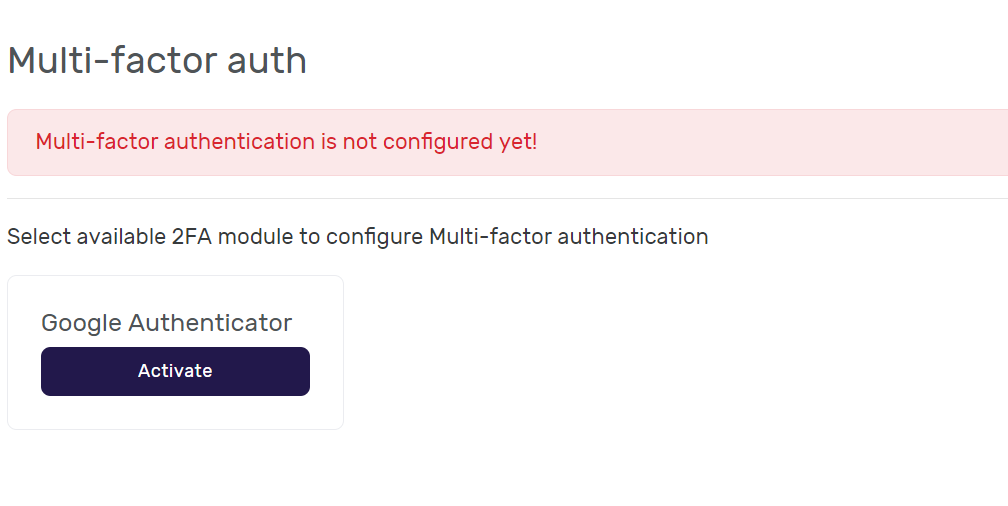
Step 3: Open the Multi-Factor Authentication Panel
Within the Security Settings page, find the Multi-Factor Authentication (MFA) section. Click on it to expand the available options.
You will see the current authentication status (disabled by default) and the option to activate TOTP-based 2FA. Click Activate or Enable to begin the enrollment process.
Step 4: Install Google Authenticator on Your Device
Before scanning the QR code, install an authenticator app on your mobile device:
For Android:
Install Google Authenticator from the Google Play Store:
https://play.google.com/store/apps/details?id=com.google.android.apps.authenticator2
For iOS:
Install Google Authenticator from the Apple App Store:
https://apps.apple.com/us/app/google-authenticator/id388497605
After installation, open the app. You do not need to sign in to a Google account to use the core TOTP functionality, though signing in enables cloud backup of your tokens.
Step 5: Scan the QR Code and Verify
Back in the AlexHost MFA panel, a QR code will be displayed on screen. In Google Authenticator:
- Tap the + button (Add account)
- Select Scan a QR code
- Point your camera at the QR code displayed in your browser
The app will immediately begin generating 6-digit codes that refresh every 30 seconds. Enter the current code into the verification field in the AlexHost panel and click Confirm or Verify.
Critical: Before closing the setup screen, save your backup codes if AlexHost provides them. These single-use codes allow account recovery if you lose access to your authenticator app. Store them in a password manager or a physically secure location — never in plain text on the same device as your authenticator.
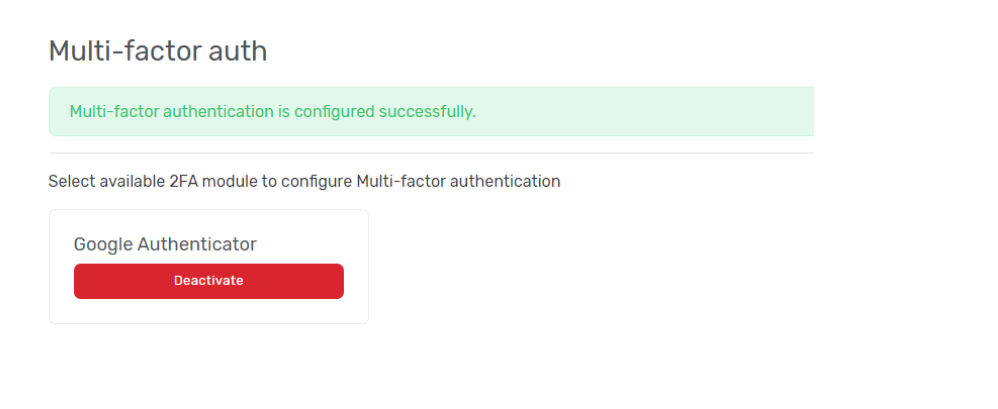
Step 6: Confirm 2FA Is Active
After successful verification, the MFA panel will show 2FA as Enabled. On your next login, AlexHost will prompt for your password first, then request the 6-digit TOTP code from your authenticator app as the second factor.
Common Issues and How to Resolve Them
TOTP Code Is Rejected Despite Being Correct
The most frequent cause is clock drift. TOTP codes are time-sensitive with a typical tolerance window of ±30 seconds (one code period). If your device clock is out of sync:
- Android: Go to Settings > General Management > Date and Time > enable "Automatic date and time"
- iOS: Go to Settings > General > Date & Time > enable "Set Automatically"
- Google Authenticator: Open the app > Settings > Time correction for codes > Sync now
Lost Access to Your Authenticator App
If you lose your device or uninstall the app without backing up:
- Use your saved backup/recovery codes if you stored them during setup
- Contact AlexHost support directly with identity verification to request manual 2FA removal
- If you used Google Authenticator with Google Account sync enabled, restore your tokens on a new device by signing into the same Google account
This scenario underscores why backup codes must be treated as critical security assets, not afterthoughts.
QR Code Will Not Scan
If the camera cannot read the QR code, most authenticator apps offer a manual entry option. AlexHost's MFA panel should display the underlying secret key as a text string alongside the QR code. Enter this key manually in the authenticator app by selecting "Enter a setup key" instead of scanning.
2FA Across Your Entire Hosting Stack
Enabling 2FA on your AlexHost client area is the first layer, but a comprehensive security posture requires protecting every access point:
- Control panel access: If you use a VPS with cPanel, enable 2FA within cPanel itself separately — it operates independently from the AlexHost client area login.
- SSH access: Replace password-based SSH authentication with key-pair authentication and disable
PasswordAuthenticationinsshd_config. SSH keys are functionally equivalent to hardware 2FA for server access. - Email accounts: If you use Email Hosting, enable 2FA on your email provider as well — email is the primary recovery vector for most accounts, making it a critical attack surface.
- Domain registrar access: Protect your Domain Registration account with 2FA. DNS hijacking through a compromised registrar account can redirect all traffic from your domain, bypassing server-level security entirely.
- SSL certificate management: Unauthorized access to your SSL Certificates panel could allow certificate revocation or fraudulent issuance requests.
Security Decision Matrix: Choosing the Right 2FA Method
Not all second factors are equal. Here is a practical comparison of the methods you may encounter:
| Method | Security Level | Phishing Resistant | Offline Capable | Recommended For |
|---|---|---|---|---|
| TOTP (Authenticator App) | High | Partial | Yes | Most users — strong balance of security and usability |
| Hardware Key (FIDO2/WebAuthn) | Very High | Yes | Yes | High-value accounts, enterprise environments |
| SMS OTP | Low-Medium | No | No | Avoid if possible — vulnerable to SIM swapping |
| Email OTP | Low | No | No | Last resort only — depends on email account security |
| Backup Codes | Medium | No | Yes | Emergency recovery only — single use |
TOTP via an authenticator app is the practical sweet spot for most hosting customers. Hardware security keys (YubiKey, Google Titan) offer superior phishing resistance but require physical key management.
Technical Key-Takeaway Checklist
Before considering your account secured, verify each of the following:
- 2FA is active on your AlexHost client area login — confirmed in Security Settings
- Backup codes are saved in a password manager or offline secure storage, not on the same device as your authenticator
- Device clock is synchronized automatically to prevent TOTP validation failures
- Authenticator backup is enabled — Google Account sync in Google Authenticator, or an export in Aegis/Bitwarden
- 2FA is also enabled on your email account, since email is the account recovery fallback
- cPanel or other control panel 2FA is configured separately if you use a managed panel environment
- SSH key authentication is used instead of passwords for any server with shell access
- Recovery plan is documented — you know exactly what steps to take if you lose your authenticator device
Frequently Asked Questions
What happens if I lose my phone after enabling 2FA on AlexHost?
Use the backup/recovery codes you saved during 2FA setup to log in. If you did not save them, contact AlexHost support with account verification details to request manual 2FA removal. This process requires identity confirmation to prevent social engineering attacks.
Does AlexHost 2FA work with authenticator apps other than Google Authenticator?
Yes. AlexHost uses the standard TOTP protocol (RFC 6238), which is supported by any compliant authenticator app including Authy, Microsoft Authenticator, Aegis, and Bitwarden's built-in TOTP generator. The QR code or secret key displayed during setup works with all of them.
Can I disable 2FA after enabling it?
Yes, through the same Multi-Factor Authentication section in your Security Settings. You will need to authenticate with your current TOTP code to confirm the change. Disabling 2FA is not recommended unless you are immediately replacing it with a stronger method.
Why does my TOTP code keep getting rejected?
The most common cause is a device clock that is not synchronized. TOTP codes are valid for a 30-second window. Enable automatic time synchronization on your device and use the time correction feature within Google Authenticator (Settings > Time correction for codes > Sync now).
Is 2FA required for all AlexHost accounts?
As of the time of writing, 2FA is optional but strongly recommended for all account types. Given that a compromised hosting account can expose entire server environments — particularly relevant for VPS Control Panels and dedicated infrastructure — treating it as mandatory is the operationally sound approach.